3D Scanner for Small Parts: How to Choose One
A practical guide to choosing a 3d scanner for small parts, from accuracy and scan range to tracking, light and export formats.

On this page
Top picks at a glance
As an Amazon Associate I earn from qualifying purchases.
- 1
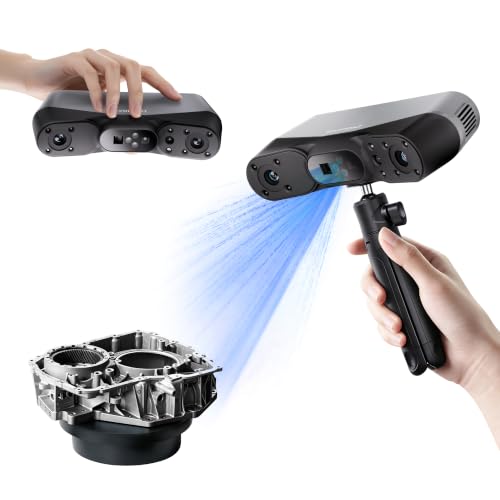 Revopoint POP 4 3D ScannerView on Amazon
- 2
 Revopoint INSPIRE 2 3D ScannerView on Amazon
- 3
 3DMakerpro Fox 3D ScannerView on Amazon
- 4
 Revopoint MINI 2 3D ScannerView on Amazon
- 5
 Creality Pika Portable 3D ScannerView on Amazon
- 6
 Creality Otter Lite Wireless 3D ScannerView on Amazon
A small gear snaps, a figurine loses a corner, a bracket for a drawer slide goes missing, and the part is too small to measure with a ruler and redraw by hand. A 3d scanner for small parts turns that physical object into a digital model you can print, copy or adapt. The scanner reads the surface of the part and builds a mesh from the points it captures, and the right scanner is the one whose accuracy, scan range and tracking suit objects the size of a coin or a chess piece. This guide explains what to look for, using the figures makers publish for handheld scanners, and walks through a first scan from setup to export.
Other machines to compare
 Revopoint POP 4 3D ScannerCheck price on Amazon
 Revopoint INSPIRE 2 3D ScannerCheck price on Amazon
 3DMakerpro Fox 3D ScannerCheck price on Amazon
 Revopoint MINI 2 3D ScannerCheck price on Amazon
 Creality Pika Portable 3D ScannerCheck price on Amazon
 Creality Otter Lite Wireless 3D ScannerCheck price on Amazon
LaserEngraveHQ earns a commission from purchases made through these links, at no extra cost to you. Read our affiliate disclosure.
Every figure in this guide comes from the maker pages for the scanners named here. Where a maker does not state a figure, this guide says so instead of guessing.
Choosing a 3d scanner for small parts: accuracy and resolution
Accuracy and resolution are the figures that decide whether a scan of a small part is useful. Accuracy is how close the scanned model sits to the real part. Resolution, often given as point spacing, is how fine the detail is that the scanner can pick up. For small parts, accuracy and resolution matter together, because a feature the scanner cannot resolve will vanish from the model, and a model that drifts from the real dimensions will not fit where the part belongs.
The makers list very different figures here. The 3DMakerpro Seal Lite lists accuracy of 0.02mm with point spacing of 0.07mm. The 3DMakerpro Moose Lite (on Amazon) lists accuracy of up to 0.05mm and resolution of 0.1mm. The Fox scanner lists accuracy of up to 0.07mm and resolution of 0.10mm. The Creality CR-Scan Ferret Pro (on Amazon) lists accuracy of up to 0.1mm and resolution of 0.16mm. Smaller figures mean finer capture, so compare the figures side by side and pick the finest accuracy your parts need.
Think about the smallest feature on your parts before you compare figures. A gear tooth or a snap-fit tab needs finer capture than a smooth figurine.
Scan range and working distance
Scan range is the size of object the scanner is built to capture, and the small end of the range is the one that matters here. The Fox scanner lists objects from 40mm to 1200mm. The 3DMakerpro Moose Lite lists objects from 15mm to 1500mm. Check the small end of the range before you buy, since the maker has not promised capture below it.
Working distance is how far the scanner sits from the part while it scans. The Moose Lite lists a recommended working distance of 150mm to 400mm. Hold the scanner inside that band and move slowly. The maker pages for the Creality Ferret Pro and the 3DMakerpro Seal Lite do not state a scan range or a working distance.
Tracking, light and surface finish
Tracking is how the scanner follows the part as you move around it. The Creality Ferret Pro lists anti-shake tracking. The 3DMakerpro Seal Lite lists anti-shake lenses and optical stabilization. The 3DMakerpro Moose Lite lists scan-back and anti-shake functions. The Fox scanner lists AI SLAM tracking with marker-free scanning and re-locking onto areas already scanned if tracking is interrupted. The Ferret Pro also lists 24-bit full-color scanning, while the Moose Lite lists mono texture only.
Light matters because the scanner reads the surface with light. The Seal Lite lists 9 levels of light adjustment for low-light conditions and different colors and materials. The Ferret Pro lists outdoor scanning at up to 30,000 lux. The Moose Lite lists indoor scanning as recommended. Match the scanner to where you will actually scan.
Surface finish decides how much preparation a part needs. The Ferret Pro lists scanning of black, metal and matte objects without spray. The Fox scanner lists an NIR optical system that works on many matte dark and low-reflective surfaces. The Moose Lite lists an NIR light source. Read the maker page for the surface guidance before you scan a part with a polished finish.
Software, export formats and your computer
A scan is only useful if you can open it in your own software. The Seal Lite, the Fox scanner and the Moose Lite all list JMStudio software with export in OBJ, STL, PLY and ASC formats. The Creality page does not state export formats for the Ferret Pro.
Check the computer requirements before you buy. The Ferret Pro lists Windows with an i5 processor from the 8th generation or newer, Mac with M1 to M4 or Intel i5 or newer, and Android or iOS devices, with 8GB of RAM or more, and 4GB for iOS. The Seal Lite and the Fox scanner both list Windows in 64-bit and macOS. The Moose Lite lists Windows and macOS, with software updates free for life.
Speed figures help you judge how a scan session will feel. The Ferret Pro lists up to 30 FPS. The Moose Lite lists up to 10fps. The Seal Lite lists a scanning rate of 100,000 points per second. Faster capture makes it easier to keep tracking on a small part, but it does not replace accuracy, so weigh both figures together. Weight matters for handheld work too: the Fox scanner lists 210g and the Seal Lite lists 225g.
A first scan, step by step
Use this sequence for a first small part, and keep the part still throughout.
- Place the part on a plain surface and fix it so it cannot move.
- Set the light level and check that the scanner sees the whole part.
- Move the scanner slowly around the part, keeping the part in view at all times.
- Watch the live preview and go back over any area that looks thin or patchy.
- Export the model in the format your printer or CAD software accepts, and check the mesh before you print.
If tracking drops, stop and return to an area already scanned before you continue.
Common mistakes to avoid
- Choosing by accuracy alone and ignoring the scan range.
- Scanning a dark or shiny part without reading the maker guidance for that surface.
- Moving the scanner too fast, which breaks tracking on a small part with few features.
- Buying before checking the computer requirements.
- Expecting color texture from a scanner that captures mono texture only, as the Moose Lite lists.
3d scanner for small parts: the short version
- Pick the finest accuracy your smallest feature needs.
- Check the small end of the scan range.
- Confirm the tracking, light and surface guidance for your parts.
- Check the software, export formats and computer requirements.
- Scan slowly, keep the part still and export in a format your tools accept.
FAQ: lasers and CNC
What accuracy do I need for small parts?
It depends on the smallest feature you need to keep. The Seal Lite lists accuracy of 0.02mm, the Moose Lite lists up to 0.05mm, the Fox scanner lists up to 0.07mm and the Ferret Pro lists up to 0.1mm. Compare the figures against the parts you scan most often.
Can a 3d scanner scan black or metal parts?
Some can. The Creality Ferret Pro lists scanning of black, metal and matte objects without spray, and the Fox scanner lists an NIR optical system for matte dark and low-reflective surfaces. Read the maker page for the scanner you own before you scan a polished metal part.
Do I need markers or stickers on small parts?
Not always. The Fox scanner lists marker-free scanning with AI SLAM tracking. The other scanners here list anti-shake tracking or stabilization instead. Parts with almost no surface features are harder to track, so give the scanner a textured base or a holder to follow.
What file formats do the scans export as?
The Seal Lite, the Fox scanner and the Moose Lite list export in OBJ, STL, PLY and ASC formats through JMStudio. The Creality page does not state export formats for the Ferret Pro.
Can I scan outdoors?
The Ferret Pro lists outdoor scanning at up to 30,000 lux. The Moose Lite lists indoor scanning as recommended. For the other scanners here, the maker pages do not state outdoor use.
Related: the 3D printers hub, 3D scanner for beginners and 3D scanner price. Also see our what 3D printer should I get guide and best 3D printer for DND miniatures.