CO2 Laser Engraver for Beginners: What to Buy First
A plain-English guide to choosing a first CO2 laser engraver, from work area and power to safety, setup, and first projects.

On this page
Top picks at a glance
As an Amazon Associate I earn from qualifying purchases.
- 1
 xTool P3 80W Flagship CO2 Laser Cutter with Intelligent9.7/10View on Amazon
- 2
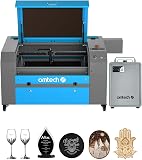 OMTech Maker 90W CO2 Laser Engraver & Cutter with Water9.6/10View on Amazon
- 3
 OMTech K40+ 45W Desktop CO2 Laser Engraver & Cutter 12" × 8"9.6/10View on Amazon
A co2 laser engraver for beginners is the right first machine for anyone who wants to cut and engrave wood, acrylic, leather, and glass at home or in a small workshop. A focused beam follows a design file and marks or cuts a fine line into the material, so signs, tumblers, leather patches, and cut parts come out clean and repeatable. The sections below walk through how the machine works, what size and power to buy first, and how to set up a safe workspace.
LaserEngraveHQ earns a commission from purchases made through these links, at no extra cost to you. Read our affiliate disclosure.
Every figure in this guide comes from the maker’s own listing. Where a listing stays silent, this guide says so rather than guessing.
Step 1: What a CO2 laser engraver for beginners does
A CO2 laser uses a glass tube filled with gas. Electricity excites the gas, the tube produces a beam, and mirrors guide that beam to a lens that focuses it onto the material. The focused spot burns, melts, or vaporizes a fine line, so one machine can engrave wood and cut acrylic shapes. For the detail behind the beam path, see what is a CO2 laser engraver.
Material range is the reason most beginners pick CO2 over other laser types. The OMTech K40+ listing states wood, acrylic, leather, plastic, fabric, and glass, and the VEVOR 100W (on Amazon) listing adds cardboard and stone. The UniXYZ marking paper (on Amazon) comes in 12 colors on a 36 cm x 24 cm sheet for glass, ceramic, crystal, and stone tiles. Bare metal is the exception, and the VEVOR 55W (on Amazon) listing states its machine is not for metal engraving, only coated metals.
Step 2: Pick a work area, power level, and speed that fits the work
Work area decides what fits on the bed, and power decides what cuts cleanly. The OMTech K40+ pairs 45W with a 12″ x 8″ work area, a desktop size for tags, patches, small signs, and tumblers with a rotary axis. The OMTech 60W steps up to a 16″ x 24″ work area (400 x 600 mm) with pass-through doors for longer pieces, and the VEVOR 55W offers a 20 x 12 in bed with a rotary axis and a 5MP camera for positioning. See the best CO2 laser cutter for home use guide for home-size machines.
Power sets cutting depth, and rated speed sets how fast jobs finish. The K40+ listing states it cuts 0.4″ (10 mm) acrylic and 0.31″ (8 mm) wood, and the VEVOR 55W listing recommends it for acrylic up to 7 mm thick and wood up to 5 mm thick. On speed, the K40+ lists up to 300 mm/s, the chiller bundle lists up to 13.8 ips (350 mm/s), and the VEVOR 55W reaches up to 500 mm/s. The K40+ also lists a built-in 45° air assist that blows smoke and debris away from the lens. Match the machine to the thickest material on the project list.
Step 3: Set up ventilation and fire safety before the first cut
A laser makes smoke and can start a fire, so the workspace comes before the first job. The K40+ listing describes door and water protection, an emergency stop, a flame-retardant observation window, and a high-powered exhaust fan. Vent the exhaust outdoors or through a filter made for laser fumes, keep a fire blanket within reach, and never leave a running job unattended. See the best fire blanket for laser engraver under 15 guide for small-shop options.
Materials matter as much as the machine. Never laser PVC, vinyl, PVC-based faux leather, polycarbonate, or ABS: those materials can release harmful fumes and damage the machine. The how to use a CO2 laser cutting machine guide walks through a safe first session, from material choice to shutdown.
Step 4: Learn the software and run a practice piece
Most CO2 machines in the listings run LightBurn, and several also list LaserGRBL, RDWorks, CorelDRAW, or AutoCAD. The K40+ listing states it works with LightBurn and includes LaserGRBL, the OMTech 60W listing states RDWorks, and the VEVOR 100W listing states LightBurn, CorelDRAW, and AutoCAD across Windows, Linux, and macOS. Learn the software on scrap material before touching a blank meant for sale. The laser engraver for beginners guide covers the same learning curve.
Step 5: Keep the mirrors aligned, the tube healthy, and the water clean
A CO2 beam travels by mirror, so alignment is a regular job, not a one-off fix. The how to align mirrors on a CO2 laser guide shows the process step by step. The laser tube is the part with a stated life: the OMTech 60W (on Amazon) listing states up to 1000 hours of usage, the VEVOR 55W listing states a tube life of 3,500+ hours, and the OMTech Pro 150W (on Amazon) listing states an 11,000-hour lifespan. Cooling matters just as much: the K40+ chiller bundle ships with a CW-3000 water chiller, the OMTech Pro 150W lists a built-in CW-5200 water chiller, and the VEVOR 55W listing states water pump cooling. For the water itself, see the distilled vs deionized water for CO2 laser guide and the water cooled vs air cooled CO2 laser guide.
Common mistakes to avoid
- Buying the largest machine before knowing which material the work needs.
- Skipping ventilation until the smell becomes a problem.
- Lasering PVC, vinyl, or ABS because the blank was cheap.
- Skipping the practice piece and cutting the good blank first.
- Forgetting the chiller, the exhaust, and the fire blanket in the setup plan.
CO2 laser engraver for beginners: the short version
- Learn what a CO2 laser cuts and what it cannot cut.
- Pick a work area and power level that fits the project list.
- Set up ventilation, fire safety, and an exhaust route.
- Learn the software on scrap material.
- Keep the mirrors aligned and the cooling water clean.
FAQ: lasers and CNC
What size CO2 laser engraver should a beginner buy?
Match the bed to the largest piece on the project list. The K40+ at 45W with a 12″ x 8″ work area suits tags, patches, and small signs, the OMTech 60W with a 16″ x 24″ work area (400 x 600 mm) suits larger signs and batch work, and the VEVOR 100W with a 24 x 35 in work area (600 x 900 mm) suits long pieces.
Is a CO2 laser engraver good for wood and acrylic?
Yes, those are its core materials. The K40+ listing states it cuts 0.4″ (10 mm) acrylic and 0.31″ (8 mm) wood, and the VEVOR 55W listing recommends it for acrylic up to 7 mm thick and wood up to 5 mm thick. Glass, leather, fabric, cardboard, and stone also appear across the listings.
Do I need a water chiller for a CO2 laser?
Many desktop models cool with a water pump. The VEVOR 55W listing states water pump cooling, the K40+ bundle ships with a CW-3000 water chiller, and the OMTech Pro 150W lists a built-in CW-5200 water chiller.
Can a CO2 laser engrave glass?
Yes. The K40+ listing states glass among its materials, and the UniXYZ marking paper listing states it works on glass, ceramic, crystal, and stone tiles in 12 colors. The paper comes on a 36 cm x 24 cm sheet that cuts to any size.
What software does a beginner CO2 laser use?
LightBurn is the most common choice across the listings. The K40+ listing states LightBurn and includes LaserGRBL, the OMTech 60W listing states RDWorks, and the VEVOR 100W listing states LightBurn, CorelDRAW, and AutoCAD.
How do I keep a CO2 laser safe at home?
Vent fumes outdoors or through a filter made for laser fumes, keep a fire blanket and an extinguisher within reach, and never leave a running job unattended. Listings state door protection, an emergency stop, a flame-retardant window, and a power cut-off, and the K40+ listing states Laser Class 2 with 0.827 mW output power while the VEVOR 100W listing states Laser Class 1. Tinted windows are not eye protection on their own.
Related: the best CO2 laser cutter for home use, diode vs CO2 laser for wood and cost of CO2 laser. Also see the laser engraver maintenance guide.