Easiest Software for CNC Router: A Practical Beginner Guide
A practical guide to the easiest software for CNC router beginners, covering all-in-one design tools, gcode senders, and simple carving workflows.

On this page
Top picks at a glance
As an Amazon Associate I earn from qualifying purchases.
- 1
 SpeTool Carbide Single Flute CNC Router Bits 1/8" Cutting9.7/10View on Amazon
- 2
 SainSmart Genmitsu 3020-PRO Ultra CNC Router Machine9.7/10View on Amazon
- 3
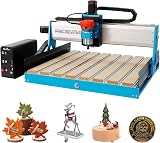 6050 CNC Router Machine9.6/10View on Amazon
The easiest software for cnc router beginners is Easel, because it combines design, toolpath generation, and machine control into a single browser interface. When you want to carve signs, decorative trays, or relief projects in wood and plastic, dealing with multiple separate software packages creates unnecessary friction. Instead of learning independent computer-aided design (CAD) programs, standalone computer-aided manufacturing (CAM) processors, and separate gcode senders, a unified program lets you import vector graphics, configure cut depths, select your router bit, and stream commands directly to your tool. For hobbyists learning how to use a CNC router for beginners, starting with an all-in-one platform removes the steep learning curve and lets you focus on clean cutting and dependable workholding.
LaserEngraveHQ earns a commission from purchases made through these links, at no extra cost to you. Read our affiliate disclosure.
While an all-in-one browser tool offers the quickest path to your first finished carving, standalone programs provide deeper control as project complexity increases. Starting with a unified program helps you learn core concepts before you decide whether dedicated design suites and specialized post-processors are necessary for your workshop.
Step 1: Understand the core stages of CNC router software
Operating a computer-controlled router involves fundamental software jobs: designing the shape, generating cutting paths, and streaming machine instructions. In traditional machining workflows, each phase requires a dedicated program:
- Design (CAD): Computer-aided design software is where you draw vectors, layout typography, or create relief models. Popular standalone tools range from vector illustration packages to complex parametric modeling software like Fusion 360.
- Toolpath generation (CAM): Computer-aided manufacturing software takes your design vectors and calculates how the spinning router bit must travel through the material. CAM assigns cut depths, stepover spacing, plunge rates, and feed rates, then translates those motions into standard gcode coordinates.
- Machine control (gcode sender): A control sender connects your computer to the router mainboard over a serial connection. It handles jogging the axes, setting coordinate origin points, and streaming gcode lines to firmware such as GRBL.
When you are learning desktop CNC machine for beginners fundamentals, juggling multiple separate interfaces can feel overwhelming. A mistake in post-processing can result in broken cutters or ruined workpieces. This is why starting with software that integrates all stages into one screen makes the early learning phase far more manageable. To learn more about how machine control architectures differ, read our guide on GRBL vs proprietary CNC controller setups.
Step 2: Start with Easel for all-in-one designing and carving
Easel remains widely regarded as the easiest software for cnc router work because it eliminates file conversions between CAD and CAM. You open a browser tab, define the dimensions of your material board, and draw or import artwork. The screen displays a flat layout pane alongside a realistic preview that shows how the carved piece will look before you cut into real stock.
The software includes pre-configured material presets for pine, hardwood, acrylic, and machinable plastics. When you pick a material and choose your cutter profile, the software automatically recommends conservative feed rates and plunge depths. This built-in guidance prevents common beginner errors such as plunging too aggressively into dense grain. You can assign vector paths to cut inside outlines, clear interior pockets, or trace directly along lines, making it simple to complete signmaking and lettering projects like those detailed in our guide on how to V carve signs on a CNC.
Because Easel runs inside standard web browsers, you do not need a high-end workstation computer in your shop area. You can design on a laptop inside your home, then either stream commands directly to a compatible USB-connected machine or export standard gcode files to run through separate sender utilities.
Step 3: Connect your machine with Candle or Universal G-code Sender
While all-in-one software can connect directly to compatible machines, many desktop carvers arrive paired with dedicated gcode streaming utilities. Common open-source senders used across hobby carving are Candle and Universal G-code Sender (UGS). Both utilities communicate with GRBL-based desktop routers and are worth understanding as your workshop grows.
Candle provides a compact interface featuring a visualizer that tracks the live coordinate position of your spindle as it moves across the cutting area. It displays coordinate readouts, feed override sliders, and spindle speed controls. For makers who prefer deeper configuration options, Universal G-code Sender (UGS) provides customizable macro buttons, robust coordinate system management, and broad platform compatibility. If your machine features an offline handheld controller, such as the offline control module included with the LUNYEE 3018 Pro Ultra desktop router, you can load exported gcode files directly onto memory cards and run jobs without keeping a computer tethered in your workspace. When choosing hardware to pair with these tools, consult our overview of the best desktop CNC for beginners.
Step 4: Configure feed rates, speeds, and router bit tooling
No matter which software program you select, successful carving depends on setting appropriate feeds and speeds. Feed rate refers to how fast the machine drives the cutting bit horizontally across the material, while spindle speed determines how fast the cutter rotates. Balancing both factors ensures your bit produces clean chips rather than rubbing and scorching your stock.
Spindle power and motion capabilities vary across machines. For example, the maker of the LUNYEE 3018 Pro Ultra lists an upgraded 500W spindle and a 300 × 180 × 80mm work area for wood and soft metals. For the LUNYEE 3020 Nova, the listing states an 800W spindle and travel speeds up to 5000mm/min. When programming toolpaths, align your depth per pass and feed rates with the power and rigidity of your specific machine rather than using generic figures. For routers with lower spindle power, programming shallow depth per pass and moderate feed rates prevents motor stalls and tool deflection. As you gain experience matching cutters to pine, oak, and plastics, explore our detailed reference on CNC feeds and speeds for beginners and review our breakdown of the best CNC bit set for beginners.
Step 5: Secure your workpiece and set machine zero coordinates
Before streaming gcode to your router, you must establish the relationship between your software model and the physical raw stock clamped to the wasteboard. This step requires setting the work coordinate zero point along the X, Y, and Z axes.
First, secure your stock completely flat. Any movement during a cut will ruin workpiece alignment and can snap small end mills. Standard hold-down methods include T-track clamps, cam clamps, and double-sided woodworking tape. Ensure your wasteboard is flat and true by learning how to set up a spoilboard on a CNC before mounting valuable stock.
Next, jog your cutter to your chosen origin corner, which is typically the front-left corner of the stock in beginner software setups. Lower the cutter until the tip contacts the reference surface (most commonly the top of the stock for beginner carving). In your control software, zero the X, Y, and Z axis registers. Your machine now knows precisely where the virtual design coordinates align with your physical material.
Step 6: Run a sample carve and inspect your results
The safest way to verify software settings is to execute a trial run on scrap material before carving into finished hardwood. Set your work coordinates slightly above the stock surface to perform an air run. Watch the gcode visualizer on your screen while observing the machine carriage to confirm that the toolpath stays within your expected boundaries and clears all hold-down clamps.
Once the motion looks correct, lower the cutter to surface zero and start the carving cycle. Keep your hand near the emergency stop switch throughout the initial pass. Listen to the sound of the cutter: a steady hum with crisp chip evacuation indicates proper feed rates, while chattering or high-pitched screeching signals excessive vibration or incorrect spindle speed. After completing the run, inspect the cut surfaces for fuzziness or burning, and adjust your feed rates, spindle speed, or depth per pass in software accordingly. For project inspiration that fits entry-level workflows, check our curated ideas for CNC router projects for beginners.
Common mistakes to avoid
- Starting with complex industrial CAD and CAM suites: Jumping directly into professional parametric modeling software creates an overwhelming barrier of toolpath parameters before you grasp basic carving mechanics.
- Programming excessive depth per pass: Forcing a hobby spindle to cut too deeply in a single pass leads to skipped steps, motor stalls, and broken router bits.
- Failing to zero the Z axis accurately: Approximating surface contact can cause bits to plunge into the spoilboard or cut too shallowly across uneven wood.
- Neglecting clamp clearance during tool travel: Designing toolpaths without verifying rapid transit heights can cause spinning chucks or collets to collide with hold-down clamps.
- Leaving active carving runs unattended: Operating a spinning router without continuous supervision creates unnecessary fire and mechanical hazards.
Easiest software for cnc router: the short version
- Launch an all-in-one browser tool like Easel to combine design layout, toolpath creation, and machine control in a single tab.
- Define your board thickness, choose your stock material, and import your artwork or lettering.
- Select your router bit profile and let the software apply conservative feed rates and plunge depths.
- Clamp your material securely to the spoilboard using mechanical clamps or hold-down tape.
- Jog the cutter to your material origin and zero the X, Y, and Z axes.
- Perform an air run above the stock, then start the spindle and monitor the carving run to completion.
Following this streamlined workflow keeps your early carving sessions predictable and enjoyable. Once you master basic profile cuts and pocket clearing, you can branch out into advanced toolpaths and specialized software with complete confidence.
FAQ: lasers and CNC
How to cnc router?
To operate a CNC router, you create a digital design, generate gcode toolpaths using CAM software, secure your material to the wasteboard, zero your cutting bit at the stock origin, and stream the commands to your machine controller. Beginners should start with simple flat profiles or engraved signs in soft woods before tackling detailed relief carvings or non-ferrous metals.
How to set up a cnc router?
Setting up a CNC router involves assembling the rigid metal frame, squaring the gantry, connecting stepper motor wiring, installing limit switches, and flattening the spoilboard. After checking mechanical alignments and cable routing, connect the machine to your computer, launch control software like Candle or UGS, verify axis travel directions, and confirm emergency stop functionality.
How to use a cnc router for beginners?
Beginners should use an integrated browser platform like Easel to minimize software complexity. Clamp a flat piece of scrap pine to the bed, select a standard end mill, set conservative feed rates with light depth per pass, zero the X, Y, and Z axes, and observe the cutting action closely to understand chip clearance and machine sounds.
How to program cnc router?
Programming a CNC router involves converting vector artwork into machine-readable gcode coordinates. In your CAM software, assign specific toolpath operations such as profile cutouts, pocket clearing, or V-carving to your vectors. Specify cutter geometry, spindle speeds, depth per pass, and safe travel heights, then export the calculated gcode file to your machine sender.
How hard is it to use a cnc router?
Using a CNC router has a moderate learning curve, but modern software makes the process far more accessible than in the past. While managing feeds, speeds, and workholding requires patience and practice, all-in-one software eliminates the need to write raw gcode by hand, allowing new makers to produce clean, accurate wooden projects quickly.
Related: the CNC router hub, best desktop CNC for beginners, and best CNC router for small business. Also see our desktop CNC machine for beginners guide and our walkthrough on CNC router projects for beginners.