CNC Feeds and Speeds for Beginners: Feeds and Speeds Explained
A beginner guide to CNC feeds and speeds: understand how spindle rotation, travel rate, chip load and cut depth balance to give clean cuts without breaking bits.

On this page
Top picks at a glance
As an Amazon Associate I earn from qualifying purchases.
- 1
 Bosch GKF125CEN Colt 1.25 HP9.4/10View on Amazon
- 2
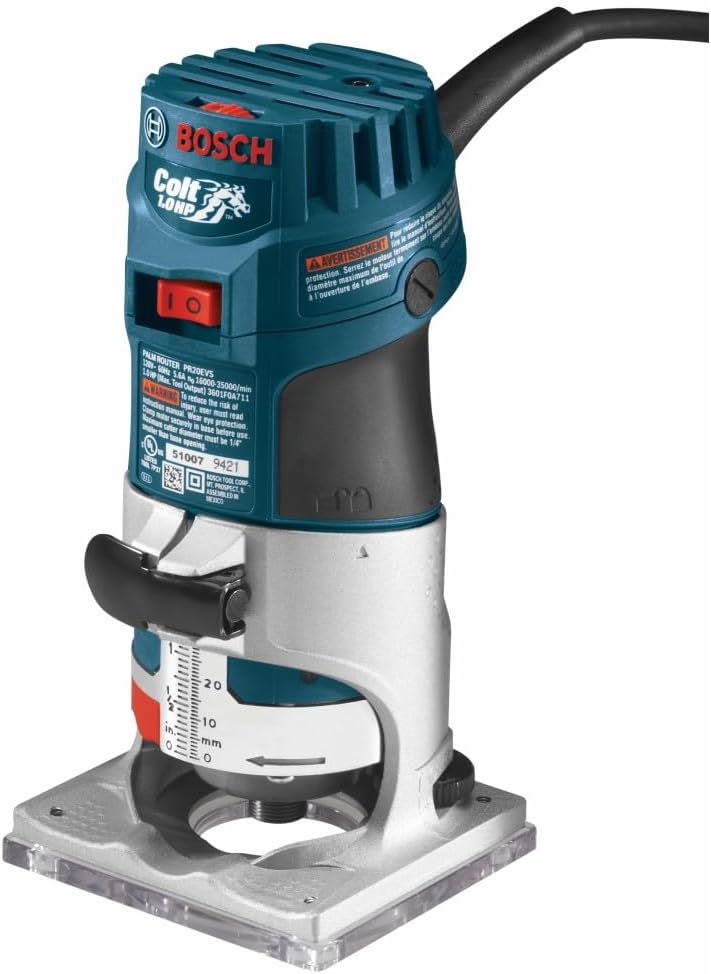 BOSCH PR20EVS Colt 1.0 HP Variable-Speed Palm Router9.4/10View on Amazon
- 3
 WEN RT1460 6-Amp Handheld 1/4-Inch Variable Speed Laminate9.3/10View on Amazon
CNC feeds and speeds for beginners balance spindle rotation rate, travel speed, chip load and cut depth to produce clean cuts without breaking bits or burning workpieces. Feed rate refers to how quickly the cutting tool moves through stock, while spindle speed refers to how rapidly the cutter spins. Getting this balance right ensures each flute shears a clean chip rather than rubbing against stock or taking on excessive cutting forces. The guide below breaks down the core concepts step by step, covers practical calculation methods, and explains how to dial in settings safely on your machine.
LaserEngraveHQ earns a commission from purchases made through these links, at no extra cost to you. Read our affiliate disclosure.
Every router, spindle, and material combination behaves differently, so manufacturer speed charts serve only as starting baselines. Real-world machine rigidity and bit wear require listening to the cut and inspecting your chips to make final adjustments on scrap stock.
Step 1: Understand what feeds and speeds mean
In CNC routing, feeds and speeds describe the primary motion rates of your machine. Spindle speed is the rotational rate of the cutting bit, measured in revolutions per minute. Feed rate is the linear velocity at which the machine drives that spinning bit through the workpiece across your cutting axes.
Neither rate exists in isolation. Spinning the cutter rapidly while moving forward sluggishly causes the cutting edges to rub the same spot repeatedly, generating extreme friction and heat. Moving forward too rapidly overloads the cutter, causing deflection and tool failure.
Every machine has physical limits established by its motor and motion hardware, and these limits vary across different designs. For example, the Genmitsu PROVerXL 4030S listing publishes a 710W spindle with a maximum rotational speed of 30000 rpm, and notes an upgraded controller that boosts operating speeds from 2000 mm/min up to 5000 mm/min on that specific machine. Other desktop models feature different motor capacities or narrower velocity limits, which is why reviewing specifications as outlined in our guide on how to choose a desktop CNC router helps you understand the operational boundaries of your particular hardware.
Step 2: Learn why chip load governs your cuts
Chip load is the physical thickness of the slice of material that a single cutting edge removes during each revolution of the bit. Balancing rotational speed and travel velocity maintains a healthy chip load suited to your material.
When chip load is too thin, the cutter rubs rather than cuts. Friction creates intense heat, scorching wood, melting plastics, and dulling carbide edges prematurely. When chip load is too thick, cutting resistance forces the bit to deflect, creating chatter marks or snapping the tool. Excessive force can also cause stepper motors to skip steps and lose position, a problem detailed in our guide on why a CNC loses steps.
Step 3: Select the right bit and flute count
Cutting flutes are the spiral grooves and sharpened edges that wrap around the tool body. Flute count determines how many cutting passes occur during each spindle revolution.
Single-flute bits feature an expansive valley for chip evacuation, helping clear waste quickly in materials prone to melting, such as acrylic and soft plastics. Dual-flute bits balance chip clearance with edge strength, making them widely used cutters for general woodworking. To explore cutter profiles, consult our guide to CNC router bit types.
Multi-flute bits can provide smooth surface finishes on dense stock, but narrower valleys between flutes generally require faster travel speeds to maintain proper chip size. Starter collections like those in our guide to the best CNC bit set for beginners offer versatile starter options.
Step 4: Factor in cut depth and machine rigidity
Chip load calculations determine feed rate and spindle speed, but depth and width of cut dictate total cutting load on the machine frame. Axial depth refers to how deeply the bit penetrates into the workpiece along the vertical axis during each pass, while radial width describes horizontal stepover.
Taking an aggressive cut depth engages more flute area, increasing lateral deflection forces on the machine carriage. Many desktop routers feature lightweight aluminum structural components that can flex under substantial side loads. When working on equipment featured in our guide to the best CNC router under 1000, machine rigidity generally calls for conservative cut depths. Taking shallow multiple passes maintains proper chip load while keeping lateral cutting forces within the practical limits of your machine frame.
Step 5: Calculate your baseline feeds and speeds
Machinists calculate starting parameters using a straightforward formula: feed rate equals spindle speed multiplied by flute count multiplied by target chip load. Start by referencing recommended chip load values from your tooling maker for your material.
Select a moderate spindle speed within the capable range of your machine. Multiply that speed by flute count and target chip load to calculate your baseline linear travel rate. If the resulting feed rate exceeds your machine capabilities, lower spindle speed or switch to a cutter with fewer flutes.
Where possible, avoid plunging straight down into solid stock without ramping, as flat-bottom cutters generate high vertical resistance. Programming ramped or helical lead-in toolpaths allows the cutter to shave away stock gradually as it descends to depth.
Step 6: Listen to the cut and inspect your chips
Calculations provide starting baselines, but observing cutting behavior allows you to refine settings safely. Paying close attention to sensory feedback is an important habit during every job.
A healthy cut produces a steady, consistent buzzing hum. High-pitched screeching or whining generally indicates the cutter is rubbing against stock rather than biting cleanly. Harsh rattling or pronounced vibration indicates tool deflection and mechanical chatter. A deep, straining sound signals that the spindle motor is bogging under heavy resistance. Visually, the cutter should eject distinct chips or flakes. Fine powdery dust indicates rubbing from an inadequate chip load. If you detect rubbing, increasing feed rate or reducing spindle speed helps the flutes bite into fresh material. If you encounter chatter, reducing feed rate or taking shallower passes lowers cutting forces until the cut runs smoothly.
Step 7: Dial in feeds and speeds for different materials
Material properties alter how cutting flutes interact with the workpiece, calling for tailored parameters.
Softwoods like pine cut with minimal resistance but can tear along the grain if cutters are dull. Hardwoods like oak and walnut present higher cutting resistance, generally requiring sharp carbide cutters and moderate pass depths to prevent burning. Tooling options are covered in our guide to CNC router bits for cutting wood.
Plastics typically cut best with single-flute cutters and swift travel speeds so waste chips carry heat away before acrylic can soften or melt. Soft metals like aluminum generally require shallow pass depths, rigid workholding, and active chip clearing to prevent waste from welding to the cutter flutes.
Common mistakes to avoid
- Running the spindle at maximum speed while moving the gantry slowly, which overheats cutters.
- Plunging straight down into dense stock instead of using ramped entry moves.
- Setting deep cut depths that exceed desktop frame rigidity.
- Using dull or resin-coated cutters that increase cutting forces.
- Failing to clamp workpieces securely, causing vibration.
- Allowing chips to pack inside deep slots and recut.
CNC feeds and speeds for beginners: the short version
- Look up the recommended chip load from your bit maker for your material.
- Choose a suitable cutter, such as single-flute geometry for plastics or dual-flute for general woodworking.
- Set a moderate baseline spindle speed suited to your machine.
- Multiply spindle speed by flute count and target chip load to find feed rate.
- Set shallow cut depths per pass to preserve machine rigidity.
- Execute a trial pass on scrap stock, listening for smooth cutting sounds.
- Adjust overrides until the cut produces crisp chips without rubbing or harsh vibration.
Dialing in cutting parameters takes patience on scrap stock, but mastering these relationships protects your tooling and delivers smooth, accurate parts every time.
FAQ: lasers and CNC
What happens if my feed rate is too slow?
When feed rate is too slow relative to spindle speed, the cutter rubs against the workpiece instead of cutting. Friction generates extreme heat, scorching wood, melting plastics, and dulling carbide edges rapidly.
What happens if my feed rate is too fast?
If travel speed exceeds the shearing capacity of the flutes, cutting forces spike. This leads to bit deflection, chatter marks, broken tools, or skipped stepper motor steps.
How do I know if my CNC router is cutting well?
A well-tuned cut produces a steady, pleasant hum without shrieking or harsh vibration. The bit ejects distinct chips rather than dust, leaving clean edges without burn marks.
Should I run my router at maximum RPM for everything?
No. Maximum RPM requires very fast travel speeds to maintain proper chip load. If your machine cannot travel fast enough, high RPM causes rubbing, heat buildup, and cutter damage. Many woodworking jobs run cleaner at moderate spindle speeds.
What is chip load in CNC machining?
Chip load is the physical thickness of material removed by one cutting flute during each revolution. It is the primary metric used to balance travel rate and spindle speed.
Do I need to calculate feeds and speeds for every project?
You should verify them whenever changing materials, bit diameters, or flute counts. Once established, save working settings in your CAM tool library for future use.
Related: the CNC router hub, best desktop CNC for beginners, and desktop CNC machine for beginners. Also see our review of the best CNC router bits.