CNC Router Projects for Beginners: What to Make and How to Start
A step-by-step guide to CNC router projects for beginners, covering easy starter makes from wooden signs and catchall trays to workholding and toolpath setup.

On this page
Top picks at a glance
As an Amazon Associate I earn from qualifying purchases.
- 1
 SpeTool Carbide Single Flute CNC Router Bits 1/8" Cutting9.7/10View on Amazon
- 2
 SainSmart Genmitsu 3020-PRO Ultra CNC Router Machine9.7/10View on Amazon
- 3
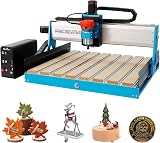 6050 CNC Router Machine9.6/10View on Amazon
- 4
 Design for CNC: Furniture Projects and Fabrication TechniqueView on Amazon
- 5
 Mastering Autodesk Fusion Edt.2View on Amazon
CNC router projects for beginners start with flat, forgiving wooden items that build core machining habits: engraved workshop signs, shallow catchall trays, coaster sets, custom spoilboard clamps and decorative gift tags. Starting with soft wood or scrap boards lets you master workholding, origin zeroing and spindle feeds before attempting tight joinery or metal cutting. The sections below walk through the most practical beginner projects step by step, along with the setup habits that prevent broken bits and ruined blanks.
Other machines to compare
 Design for CNC: Furniture Projects and Fabrication TechniqueCheck price on Amazon
 Mastering Autodesk Fusion Edt.2Check price on Amazon
LaserEngraveHQ earns a commission from purchases made through these links, at no extra cost to you. Read our affiliate disclosure.
Feed rates and cut depths depend heavily on machine rigidity, spindle power and bit sharpness. Never copy feed rates blindly from web forums without starting with light passes and keeping your emergency stop switch within reach.
Step 1: Start with engraved workshop signs and lettering
A simple wooden nameplate or workshop sign is the ideal first make on any router. Carving text into a flat board teaches you how to establish workpiece coordinates, set the Z-axis surface zero, and preview toolpaths without risking deep slotting cuts. Because the cutter only skims the surface to trace letter outlines, the cutting forces stay minimal and the workpiece is unlikely to shift.
For sharp, crisp lettering, use a dedicated carving cutter. Our guide to the V bit for CNC router work explains how angled cutter profiles produce clean grooves without tearing delicate wood grain. Start by carving simple lettering into flat pine or scrap plywood. Once the machine finishes tracing the paths, lightly sand the surface to remove fuzz, or paint the recessed letters before sanding the top face clean. If you are still setting up your machine workspace, read our guide to the desktop CNC machine for beginners to confirm basic axis movement and workspace layout.
Step 2: Carve shallow catchall trays and pocketed coasters
Once you are comfortable engraving surface lines, move to pocketing operations by carving a set of coasters or a shallow desk tray. A pocketing toolpath clears away interior material down to a specified depth, creating recessed cavities for holding coins, keys, or drinks. This teaches you how your machine handles stepover, which is the horizontal overlap between consecutive passes, and how smoothly your spoilboard supports flat stock.
Pocketing requires flat-bottom cutters rather than pointed engraving bits. You can consult our breakdown of CNC router bit types to see how upcut, downcut, and straight spirals clear chips differently. A downcut spiral leaves a pristine top edge on plywood or solid hardwood, preventing splintering around the rim of your pockets. Coaster sets are especially forgiving because you can batch several blanks from a single flat board. Review our selection of the best CNC router bits to pair the right flat spiral cutters with your machine spindle.
Step 3: Machine custom spoilboard clamps and shop fixtures
One of the most rewarding beginner projects is making functional accessories for your own CNC bed. Every maker needs reliable hold-down clamps to secure raw material without blocking cutter clearance. Machining your own wooden cam clamps, corner fences, and stepped hold-downs gives you practical shop equipment while teaching you how to combine pocketing and perimeter profiling on a single workpiece.
Making wooden clamps also provides a built-in safety margin: if your cutter accidentally strikes a wooden clamp during a job, it will not shatter your carbide bit the way steel bolts or metal vices can. Our guide to CNC clamps for woodworking covers practical hold-down layouts for hobby beds, while our comparison of cam clamps for CNC details low-profile lever designs that maximize your available cutting area. You can also mill custom alignment fences that bolt into your T-slots to align square stock instantly. For deeper guidance on maintaining your sacrificial bed, see our advice on the best CNC spoilboard materials and leveling practices.
Step 4: Cut decorative relief panels and contour items
After mastering pockets and lettering, tackle through-cutting projects like seasonal wall ornaments, puzzle pieces, layered art, and decorative relief panels. Through-cutting involves contour toolpaths that cut entirely through your stock to free the finished part from the surrounding board. This introduces two critical CNC techniques: adding holding tabs and managing lead-in ramps.
Holding tabs are small bridges of unmachined material that connect your finished piece to the scrap frame. Without tabs, the cutout part breaks loose on the final pass, where spinning router bits can throw it across the bed or mar the edge. After the machine stops, you simply cut the tabs with a small hand saw and sand the edges smooth. When choosing machine designs for these decorative items, browse the best desktop CNC for beginners to evaluate bed rigidity and frame stability. If you are comparing fabrication methods for delicate decorative work, check our comparison of CNC router vs laser cutter equipment to see where mechanical milling excels over thermal beam cutting.
Step 5: Pick stable materials and prepare flat blanks
Beginner machining success depends heavily on stock preparation. Warped, cupped, or twisted boards lead to uneven engraving depths because the router cutter tracks relative to the machine bed rather than the board face. Starting with uniform, stable materials eliminates unnecessary cutting errors while you learn your software.
Medium-density fiberboard (MDF) and high-density carving foam are the most predictable materials for practice runs because they lack natural grain, knots, and internal tension. When selecting real timber, fine-grained hardwoods like maple, cherry, and walnut machine cleanly and hold crisp detail, whereas soft woods with uneven annual rings can tear along the soft summerwood. Our guide to the best wood for CNC machine projects details which lumber species yield smooth edges without burning or splintering. Always measure your actual board thickness with calipers rather than trusting nominal lumber dimensions, and surface warped blanks before carving intricate details.
Step 6: Master workholding, origin zeroing, and safety checks
Before sending any cutting file to your machine, develop a consistent pre-run setup routine. Secure your stock firmly using your chosen workholding method, whether that means mechanical edge clamps, low-profile cam levers, or painter tape combined with cyanoacrylate adhesive. Check that your clamps clear the spindle nut and dust shoe across the entire travel envelope.
Compact starter routers like the LUNYEE 3018 Pro Ultra illustrate typical desktop capacities, providing a 300 × 180 × 80 mm working area, an HG15 linear guide rail on the X-axis, and a 500W spindle. That envelope offers plenty of space for small signs, coaster sets, and shallow desk trays, while its two included T-track clamps secure small blanks directly to the bed. For makers planning deeper carving or denser materials, machines like the LUNYEE 3020 Nova feature an 800W spindle with a speed range from 6,000 to 30,000 RPM across six speed settings, paired with 1204 ball screws, HG-15 linear guides, and travel speeds up to 5000 mm/min. If you are exploring modular machine builds, read our guide on the DIY CNC router kit. Always set your X, Y, and Z zeroes carefully, run a dry air pass above the workpiece to verify boundaries, and keep eye protection and hearing protection on whenever the spindle runs.
Common mistakes to avoid
- Running deep profile passes on raw stock instead of taking multiple shallow depth increments.
- Omitting holding tabs on through-cuts, allowing loose parts to catch the spinning cutter.
- Trusting nominal board thickness instead of measuring the actual stock with digital calipers.
- Securing warped lumber without shimming the underside, which causes the stock to flex under cutting pressure.
- Leaving the machine unattended while cutting wood or plastic blanks.
CNC router projects for beginners: the short version
- Start with surface-engraved signs and nameplates to learn zeroing and basic toolpaths.
- Carve shallow pockets into coasters and catchall trays to master stepover and chip clearing.
- Machine custom wooden clamps and corner fences to build safe, low-profile workholding for your bed.
- Progress to through-cut profile parts like ornaments and decorative panels using holding tabs.
- Select stable, flat stock such as MDF or fine hardwoods to avoid uneven carving depths.
- Establish a rigorous setup routine with secure clamping, air-cut boundary checks, and proper eye protection.
Mastering these foundational projects in sequence builds the muscle memory and file preparation skills needed for complex joinery, dimensional reliefs, and larger multi-tool operations.
FAQ: lasers and CNC
What is the easiest CNC project for a complete beginner?
An engraved wooden sign or nameplate is the simplest starting project. Surface engraving keeps cutting forces minimal, does not cut through the board, and lets you focus on workpiece alignment, zeroing your axes, and previewing toolpaths safely.
Which router bit should a beginner use first?
A pointed V-groove carving bit and a flat spiral end mill cover almost every basic project. The V-groove bit produces crisp lettering and decorative lines, while the flat end mill carves shallow pockets and cuts part outlines.
What wood is best for beginner CNC carving?
MDF is the most consistent material for initial practice because it has no grain direction or knots. When carving natural timber, close-grained hardwoods like cherry and maple hold crisp details, while flat-milled pine provides an accessible, budget-friendly alternative.
Do beginners need CAD experience before starting?
Not necessarily. Many beginners start with user-friendly design software that combines drawing tools and toolpath generation in a single interface. You can begin with pre-made project vectors, add your own text, and generate standard machine code without advanced computer-aided design training.
How do you prevent workpieces from moving during a cut?
Combine mechanical hold-down clamps with sacrificial spoilboard fences, or use the painter tape and superglue method across the bottom of flat stock. Ensuring full contact between your workpiece and the bed prevents chatter, vibration, and slipped steps during machining.
What machine size is practical for beginner desktop projects?
Compact desktop machines like the LUNYEE 3018 Pro Ultra offer a 300 × 180 × 80 mm working area with a 500W spindle, which accommodates signs, coasters, and small trays. Larger benchtop models like the LUNYEE 3020 Nova feature an 800W spindle and travel speeds up to 5000 mm/min for faster stock removal.
Related: the CNC router hub, our guide to the best desktop CNC for beginners, and our comparison of CNC router vs laser cutter. Also see our guides on CNC router bit types and the best wood for CNC machine projects.