How to Remove Powder Coat with a Laser for Tumblers
A practical step-by-step guide to removing powder coat from tumblers with a laser engraver, from rotary chuck setup and focus to beam settings and residue cleanup.

On this page
Top picks at a glance
As an Amazon Associate I earn from qualifying purchases.
- 1
 Longer Laser Engraver Air Assist kit for RAY5 10W/20W9.3/10View on Amazon
- 2
 xTool S1 40W Laser Cutter and Laser Engraver for Tumblers9.7/10View on Amazon
- 3
 TOOCAA 10W Enclosed Laser Engraver for Tumblers9.6/10View on Amazon
- 4
 MEWAY 20oz Tumbler 8 Pack Double Wall Vacuum Insulated TravelView on Amazon
- 5
 20oz insulted tumblers stainless steel cup Tumbler Bulk withView on Amazon
- 6
 20oz Stainless Steel Tumbler Bulk with LidView on Amazon
- 7
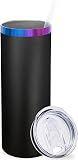 20 oz Skinny Tumblers Bulk with Lids and Straws BlackView on Amazon
- 8
 YOUKE OLA 16 Pack Stainless Steel Skinny Tumblers BulkView on Amazon
- 9
 YOUKE OLA 16 Pack Stainless Steel Tumbler Bulk InsulatedView on Amazon
How to remove powder coat with a laser for tumblers comes down to laser ablation: mounting the insulated cup on a rotary attachment, focusing the beam on the curved surface, vaporizing the coating with controlled beam energy, and wiping away residual soot to expose bare stainless steel. Diode, CO2, and fiber lasers can all ablate powder coatings when settings are properly calibrated. The sections below explain setup, rotary alignment, settings, ventilation, and cleanup step by step.
Other machines to compare
 MEWAY 20oz Tumbler 8 Pack Double Wall Vacuum Insulated TravelCheck price on Amazon
 20oz insulted tumblers stainless steel cup Tumbler Bulk withCheck price on Amazon
 20oz Stainless Steel Tumbler Bulk with LidCheck price on Amazon
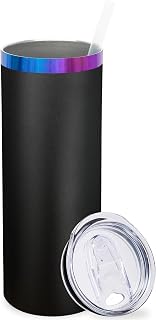 20 oz Skinny Tumblers Bulk with Lids and Straws BlackCheck price on Amazon
 YOUKE OLA 16 Pack Stainless Steel Skinny Tumblers BulkCheck price on Amazon
 YOUKE OLA 16 Pack Stainless Steel Tumbler Bulk InsulatedCheck price on Amazon
LaserEngraveHQ earns a commission from purchases made through these links, at no extra cost to you. Read our affiliate disclosure.
Laser powder coat removal vaporizes the polymer layer rather than melting the metal underneath. Because coating thickness varies across suppliers, calibrate speed and beam energy on a sacrificial sample before production runs.
Step 1: Mount the tumbler on a rotary attachment
A dedicated rotary attachment turns the cup smoothly under the gantry so the laser head fires at a consistent focal height. Chuck rotaries clamp the tumbler firmly by its rim or base to prevent slip, while roller rotaries support the cylinder from underneath.
Blanks vary by maker even at the same stated volume. For example, MEWAY lists a 20 oz tumbler measuring 3″W x 6″H made from 18/8 food grade stainless steel, while Generic lists a 20 oz tumbler measuring 3.5″W x 6.85″H in food-grade 304 stainless steel. Larger drinkware needs more gantry clearance; BBGreek lists a 40 oz tumbler measuring 10.695 inches in height with a top diameter of 3.8 inches and a bottom diameter of 2.8 inches.
On tapered models like the BBGreek cup, the 3.8-inch top diameter exceeds the 2.8-inch base diameter. Operators must raise the narrow base with an adjustable rotary bracket until the upper surface sits level beneath the gantry rail. See how to set up a rotary on a laser engraver and how to engrave a tumbler with a rotary.
Step 2: Focus the laser beam on the curved surface
Precise optical focus concentrates power density directly at the coating surface. An out-of-focus beam spreads energy over a wider area, creating blurry edges and leaving unvaporized pigment patches behind.
Establish focus at the highest apex of the tumbler profile using your machine’s focusing spacer or probe. The rotary maintains this focal height during rotation, but keeping the cylinder axis level ensures uniform focus from top to bottom.
Step 3: Select laser settings for clean coating ablation
Blue diode lasers ablate dark and colored coatings effectively because the pigments absorb the blue wavelength, though pale coatings often require a CO2 or fiber laser. CO2 lasers emit an infrared wavelength absorbed by almost all organic coatings, while fiber lasers deliver pulsed energy that strips tough coatings cleanly. Compare sources in our guides to what is a CO2 laser engraver, what is a fiber laser engraver, and the best laser engraver for metal.
Factory tumblers feature baked thermoset coatings, while aftermarket kits like GOODTAKE supply 4 oz jars of thermoplastic powder with a rated coverage of 200. Set line intervals close enough that scan passes overlap slightly, vaporizing all resin without transferring excessive heat into the mug cavity.
Step 4: Set up fume ventilation and workshop safety
Vaporizing powder coats generates airborne particulates, polymer smoke, and pungent vapors. Connect an active exhaust duct or a dedicated filtration system equipped with HEPA and activated carbon filters. Find suitable models in our fume extractor guide.
Reflective curved steel creates beam reflection risks. Operators must wear protective eyewear with certified optical density matched to the laser wavelength. Read our laser safety glasses guide.
Hazard warning: never laser PVC, vinyl, synthetic PVC leather, polycarbonate, or ABS, which release corrosive chlorine gas and toxic fumes. Verify drinkware has true powder coat rather than vinyl wraps.
Pneumatic sandblasting tools like the LE LEMATEC kit require 4 CFM at 90 PSI up to 150 PSI with 46-100 grit media. Laser ablation eliminates messy media handling while remaining clean and localized.
Step 5: Execute the laser job and monitor line tracking
Run a boundary frame pass to ensure artwork stays centered on the tumbler body and clears all rims, handles, or chuck clamps. Engage gentle air assist to keep the lens clear of rising smoke without blowing molten debris across the cold cup, and verify the rotary turns smoothly without slipping.
Step 6: Clean off residue and expose bright bare metal
Freshly engraved graphics often appear dark from condensed carbon soot and vaporized binder. Moisten a microfiber cloth with denatured alcohol or acetone and wipe across the graphic to dissolve the soot, revealing bright stainless steel. For stubborn residue in textured finishes, gently wipe with a dampened melamine sponge.
Wash the cup with warm water and mild dish soap before delivery. While MEWAY recommends hand washing for its 20 oz tumbler and Generic lists dishwasher safe, gentle hand washing protects the exposed metal edge and vacuum seal.
Step 7: Inspect bare metal and evaluate surface finish
Inspect the cleaned graphic under direct lighting for crisp edges and complete coating removal. If faint polymer film remains, rerun an ablation pass or tighten line intervals on future jobs.
Laser ablation leaves the underlying stainless steel wall and double-wall vacuum insulation intact. Sourcing blanks in volume keeps production costs low, as covered in our guide to cheap tumbler blanks, with suitable rotary machines compared in best laser engraver for tumblers.
Common mistakes to avoid
- Failing to level tapered tumblers on the rotary, causing the beam to defocus along the length of the cylinder.
- Operating without exhaust ventilation, allowing airborne polymer soot to coat machine optics.
- Applying excessive beam dwell time, which overheats the cup wall and can cause heat tint on bare metal.
- Attempting to engrave vinyl wraps instead of verified powder-coated stainless steel drinkware.
- Mistaking loose post-ablation soot for permanent discoloration instead of wiping with denatured alcohol.
- Using unrated tinted glasses instead of certified wavelength-matched laser safety eyewear.
How to remove powder coat with a laser for tumblers: the short version
- Mount the tumbler on a rotary attachment and level tapered profiles horizontally.
- Focus the laser beam on the apex of the curved surface using a focusing gauge.
- Set scanning line intervals to overlap slightly for complete coating vaporization.
- Turn on exhaust ventilation and put on certified laser safety glasses.
- Frame the artwork boundary, enable gentle air assist, and run the job.
- Wipe away soot and residue using a cloth dampened with denatured alcohol.
- Inspect the exposed stainless steel mark and wash the cup before use.
With proper leveling, correct focal height, and a prompt solvent wipe, laser ablation produces crisp, high-contrast marks on personalized drinkware.
FAQ: lasers and CNC
Can a diode laser remove powder coat from tumblers?
Yes. Diode lasers ablate dark and colored powder coatings efficiently because the pigments absorb the blue wavelength. White or very pale coatings reflect the blue beam and usually require a CO2 or fiber laser.
Does laser powder coat removal damage the stainless steel tumbler?
No. When settings are properly calibrated, ablation removes only the coating. Stainless steel has a much higher vaporization point, preserving the wall and vacuum insulation.
What chemical should I use to clean tumblers after laser ablation?
Denatured alcohol or acetone on a microfiber cloth dissolves condensed resin soot quickly without dulling the surrounding powder coat.
Why is my laser-engraved tumbler mark coming out dark instead of silver?
A dark mark immediately after engraving is usually condensed soot from the coating. Wiping with denatured alcohol reveals bright metal. If darkness persists, excessive heat may have oxidized the stainless steel.
Do I need a rotary attachment to remove powder coat from tumblers?
Yes. A rotary turns the cylindrical cup under the laser head, keeping the surface at a constant focal height across the entire graphic.
Can you remove powder coat from tumblers with chemical strippers instead of a laser?
Chemical strippers remove coating across the entire tumbler uncontrollably. A laser removes coating selectively, creating sharp vector designs while leaving the rest of the cup untouched.
Related: the laser engraver hub, engraving materials hub and best laser engraver for tumblers. Also see our guides on how to engrave a tumbler with a rotary and cheap tumbler blanks.



