How to Set Up LightBurn for a Diode Laser: A Practical Step-by-Step Guide
A step-by-step guide on how to set up LightBurn for a diode laser: connect your machine via USB, install drivers, configure GRBL settings, and set your origin.

On this page
Top picks at a glance
As an Amazon Associate I earn from qualifying purchases.
- 1
 Longer New LightBurn Camera Kit for Laser Engravers9.5/10View on Amazon
- 2
 Acmer S2 20W Laser EngraverView on Amazon
- 3
 LaserPecker LP4 Dual-Laser Engraver with Rotary & SlideView on Amazon
- 4
 LaserPecker Dual-Laser EngraverView on Amazon
- 5
 Cloudray Diode Module Red Dot Set Hole Diameter 24mmView on Amazon
- 6
 MONKEY SUN 24 Pack 4 x 4 Inch Gorgeous Black Slate StoneView on Amazon
- 7
 MONKEY SUN 60 Pack 4 x 4 Inch Gorgeous Black Slate StoneView on Amazon
Learning how to set up LightBurn for a diode laser requires connecting your machine via USB, installing compatible serial drivers, creating a GRBL device profile, setting your bed travel limits and home origin, and configuring your laser fire power for framing. Taking these steps in order ensures reliable communication between your computer and the controller before you send a live job. The sections below walk through the entire configuration step by step, covering port connection, coordinate configuration, focal adjustment, and workspace safety.
Other machines to compare
 Acmer S2 20W Laser EngraverCheck price on Amazon
 LaserPecker LP4 Dual-Laser Engraver with Rotary & SlideCheck price on Amazon
 LaserPecker Dual-Laser EngraverCheck price on Amazon
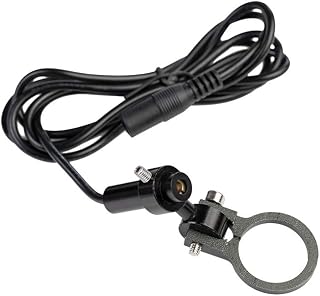 Cloudray Diode Module Red Dot Set Hole Diameter 24mmCheck price on Amazon
 MONKEY SUN 24 Pack 4 x 4 Inch Gorgeous Black Slate StoneCheck price on Amazon
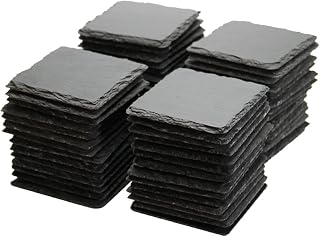 MONKEY SUN 60 Pack 4 x 4 Inch Gorgeous Black Slate StoneCheck price on Amazon
LaserEngraveHQ earns a commission from purchases made through these links, at no extra cost to you. Read our affiliate disclosure.
Most desktop diode lasers run on GRBL or compatible G-code firmware controllers. LightBurn offers a standard license for G-code controllers, which covers diode systems. You do not need the higher-tier DSP license that commercial CO2 controllers require. If you are comparing control options before purchasing, read our guide on is LightBurn worth it to inspect workflow advantages.
Step 1: Install serial drivers and connect your hardware
Place your laser engraver on a level workbench and connect the power supply. Connect the machine to your computer using a direct USB cable to prevent communication interruptions. Many diode engravers communicate over standard serial streams. For example, the ACMER S2 listing specifies a 32-bit chip for motion processing.
Confirm that your operating system detects the motherboard. Diode control boards rely on USB-to-serial chips that may require the manufacturer driver. Open LightBurn, locate the Laser window, and select your active serial port from the dropdown menu. When connected, the Console window displays a welcome message confirming the GRBL firmware version.
Step 2: Add your diode laser as a GRBL device
If you are opening LightBurn for the first time, the Device Wizard appears automatically, or you can click Devices in the Laser tab. While Find My Laser scans connected ports, setting up manually gives you direct control over machine parameters.
Click Create Manually, choose GRBL, and select Serial/USB. Enter a name for your engraver. When prompted for bed dimensions, enter the physical travel limits of your frame. For example, the ACMER S2 listing specifies a 300 × 285 mm work area, whereas the Artilume listing specifies a 200 × 150 mm work area. Entering exact bed dimensions prevents the head from hitting frame limits during rapid travel. Compare starter machines in our best laser engraver for beginners guide.
Step 3: Configure work area dimensions and home origin
The wizard then prompts for the machine home position. Many diode machines place origin at Front-Left, though some models home to Rear-Left. Set the origin corner to match your machine mechanical home position so graphics do not engrave inverted or mirrored.
Decide whether to enable Auto-Home on startup. The ACMER S2 listing notes built-in limit switches that help define the working boundary accurately. If your frame has limit switches, enable auto-homing so the gantry finds physical zero. If your machine lacks switches, disable auto-homing to prevent stepper motors from grinding against the frame. In the Laser window, select Absolute Coords so the on-screen grid matches your physical workspace for repeatable positioning.
Step 4: Enable laser mode and calibrate S-value max
GRBL firmware includes a dedicated Laser Mode setting. When enabled, Laser Mode varies optical power during acceleration and deceleration to prevent burned corners on vector cuts, while turning the beam off during rapid non-cutting travel.
Open Edit and select Device Settings. Check the S-value max field, which sets the spindle speed scale corresponding to full laser output. In standard GRBL controllers, this scale defaults to 1000. Confirm that your controller firmware maximum matches this 1000 scale so that full power commands maximum optical output. Enable the Laser Fire button and set the framing power slider to a minimal level so the diode emits a faint alignment guide without marking material.
Step 5: Adjust focal height and safety enclosures
Diode lasers require a precise focal distance to achieve clean marks. Many diode modules use a fixed-focus lens on an adjustable bracket. Place the spacer block between the module housing and your workpiece, slide the module down against the block, and tighten the bracket thumbscrews. For details, read our guide on how to focus a diode laser engraver.
Diode modules emit intense optical radiation. For example, the ACMER S2 listing specifies a 455 nm blue diode laser module, while the LASER TREE listing identifies a 40 W diode module operating at Class 4. Protective eyewear must state a certified optical density and a wavelength range matching your machine. Unrated orange plastic covers or tinted acrylic sheets without verified certification are not protection against stray reflections. See our laser safety glasses guide to verify optical density specifications.
Always vent exhaust outdoors or run fumes through a multi-stage filter. Keep a fire extinguisher nearby and never leave an active job unattended. Never cut or engrave PVC, vinyl, PVC faux leather, polycarbonate, or ABS, as they release corrosive hydrogen chloride gas that damages equipment. Consult our guide on materials you should never laser cut before working with unfamiliar blanks.
Step 6: Set up your first cut and engrave layers
Design elements in LightBurn are organized by color-coded layers controlling mode, speed, power, and pass count. Cutting uses Line mode to follow vector outlines, while engraving uses Fill mode to scan solid areas.
Always separate optical output from electrical input draw. For example, the ACMER S2 listing pairs a 12 W optical diode head with 72 W total system power, while the LASER TREE listing specifies a 40 W optical diode module. The Artilume listing provides a 7 W optical diode module capable of cutting thin wood up to 4 mm in multiple passes. Higher optical power enables faster engraving and deeper cuts. Check our laser engraver speed and power settings chart for baseline material parameters.
If your setup includes air assist, such as the 25 L/min air assist pump on the ACMER S2 listing, ensure airflow is active during cutting. Enable the Air toggle switch in your layer settings if your board supports automated control, or turn on the pump manually. Read our guide on does air assist make a difference on a laser engraver to see how airflow improves edges.
Step 7: Frame your project and run a trial burn
Verify alignment before starting a job. If your machine has limit switches, home the frame so the controller establishes machine coordinates. Position your material on the bed to match the LightBurn grid. In the Laser window, click Frame to trace the design perimeter and verify clearance around clamps. Holding Shift while clicking Frame illuminates the low-power guide dot to confirm placement.
Engraving speeds must stay within rated limits. For example, both the ACMER S2 and Artilume listings cite an engraving speed of 10000 mm/min. Put on safety glasses, start your exhaust fan, and click Start. Observe initial passes to confirm that lines cut cleanly and axes move without vibration.
Common mistakes to avoid
- Selecting an incorrect origin corner, which causes jobs to engrave inverted, mirrored, or outside physical bed boundaries.
- Leaving Laser Mode disabled in GRBL firmware, which leaves the diode energized during rapid positioning travel moves.
- Mismatching the S-value max setting in LightBurn with the firmware spindle scale, resulting in underpowered cuts or uncontrolled firing.
- Relying on unrated orange plastic covers instead of wearing certified safety glasses that state optical density and matching wavelength specifications.
- Attempting deep vector cuts without proper airflow or focal distance verification, resulting in heavy scorch marks.
How to set up LightBurn for a diode laser: the short version
- Connect your diode laser to your computer using a direct USB cable and power on the machine.
- Install the appropriate serial driver so your operating system assigns a recognized communications port.
- Open LightBurn, click Devices, choose Create Manually, and select GRBL as your controller type.
- Enter your frame bed dimensions and select the origin corner matching your machine homing setup.
- Verify that GRBL Laser Mode is active and confirm that S-value max matches the firmware scale.
- Adjust optical diode focal height above your material using your spacer gauge block.
- Frame your design perimeter on the material surface and verify safety eyewear before starting your job.
Once your machine profile and origin coordinates are properly stored, recurring engraving jobs require only importing vector artwork, assigning layer parameters, and verifying focus.
FAQ: lasers and CNC
How do I connect a diode laser to LightBurn for the first time?
Connect the laser via USB and turn on power. Open LightBurn, click Devices, select Create Manually, choose GRBL, and select your COM port. When connected, the Console displays the GRBL welcome banner.
Why is LightBurn not finding my diode laser automatically?
Automatic detection fails if the USB serial driver is missing. Install the manufacturer driver, confirm the cable is secure, and check that the machine power switch is turned on before scanning again.
Which device profile should I select for a diode laser?
Select the standard GRBL profile. Diode engravers use G-code firmware controllers. Do not select DSP, Smoothieware, or GRBL-LPC profiles unless specified by your machine manual.
Where should I set the origin for a diode laser?
Many desktop diode machines use Front-Left. Confirm your machine homing direction, as choosing the wrong corner causes jobs to engrave mirrored or inverted.
Why is my diode laser firing at full power during framing?
Holding Shift while framing fires the beam at the Fire button percentage. If set too high, the laser burns the material. Open Device Settings, confirm Laser Mode is on, and reduce framing power.
Do I need the paid DSP license of LightBurn for a diode laser?
No. Diode lasers use G-code controllers supported by the standard LightBurn Core license. The DSP license is intended for digital controllers in larger CO2 machines.
Related: explore our laser software guides, read our analysis on is LightBurn worth it, and browse the diode laser engravers hub. If you are comparing machines, see our guide on how to choose a laser engraver and our roundup of the best laser engraver for beginners.