How to Laser Engrave Slate: Materials, Settings and Finishing
A practical guide to laser engraving natural slate blanks: prepare the stone surface, calibrate your laser settings, and finish the stone to preserve crisp contrast.

On this page
Top picks at a glance
As an Amazon Associate I earn from qualifying purchases.
- 1
 VIBRATITE 60 Pack 4 Inch Square Black Slate Drink CoastersView on Amazon
- 2
 48 PCS Slate Coasters BulkView on Amazon
- 3
 24 Pcs Slate CoastersView on Amazon
- 4
 36pcs Black Slate Coasters Bulk Set 18 Round & 18 SquareView on Amazon
- 5
 12" x 12" 3 PCS Slate Cheese BoardView on Amazon
- 6
 60 PCS Slate Coasters Black Square 4 Inch Bulk RockView on Amazon
How to laser engrave slate requires cleaning the stone surface, focusing your laser beam sharply on the workpiece, dialing in high travel speed with moderate optical power, and applying an appropriate finish to protect the piece while preserving the bright mineral contrast. Natural slate fractures micro-thin layers of stone under the concentrated heat of a diode or CO2 laser beam, turning dark rock into a crisp, permanent white mark without deep cutting. The guide below explains each phase in order, from blank selection and surface preparation to beam calibration, safety practices, and long-lasting finishing methods.
Other machines to compare
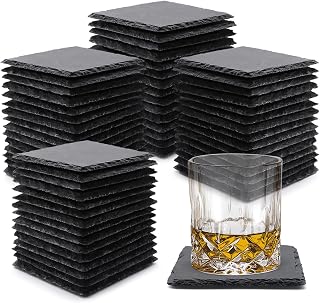 VIBRATITE 60 Pack 4 Inch Square Black Slate Drink CoastersCheck price on Amazon
 48 PCS Slate Coasters BulkCheck price on Amazon
 24 Pcs Slate CoastersCheck price on Amazon
 36pcs Black Slate Coasters Bulk Set 18 Round & 18 SquareCheck price on Amazon
 12" x 12" 3 PCS Slate Cheese BoardCheck price on Amazon
 60 PCS Slate Coasters Black Square 4 Inch Bulk RockCheck price on Amazon
LaserEngraveHQ earns a commission from purchases made through these links, at no extra cost to you. Read our affiliate disclosure.
Natural slate is a metamorphic rock formed by compressed mineral layers, meaning surface smoothness and stone density fluctuate across individual pieces. Always run a calibration grid on spare slate or an unexposed corner before engraving an entire batch of drinkware or signage.
Step 1: Select and inspect natural slate blanks
Laser engraving slate begins with choosing uniform blanks suited to your project. Drink coaster blanks from makers such as VIBRATITE, GOH DODD, dhfsleo, and KUKLIPJIM measure 4 inches by 4 inches. Bulk packs from MAPRIAL include 24 square and 24 round coasters measuring 4 inches by 4 inches, while sets from ZLOMD provide 18 round and 18 square blanks in a 36 pack. If you need larger display pieces, GOH DODD offers 12 by 12 inch cheese boards in a 3 pack with an item weight of 8.2 pounds, while DASSNANE supplies 12 by 8 inch platters in an 8 pack. For general crafting, our engraving materials overview outlines how natural stone compares to organic blanks.
Natural stone thickness varies depending on how the rock was split at the quarry. Listings from MAPRIAL report a thickness of 0.38-0.55 cm, ZLOMD lists 0.4-0.7 cm, GOH DODD cheese boards list 0.4-0.6 cm, and DASSNANE states a thickness of 0.3 centimeters. Coasters from VIBRATITE, GOH DODD, dhfsleo, and DASSNANE come equipped with 4 pads, cushions, or bumpers on the base to prevent furniture scratches. Listings from VIBRATITE, MAPRIAL, and ZLOMD describe 100% natural slate. When inspecting raw stone blanks, look for loose edge flakes, deep fissure cracks, or excessive surface curvature that could throw off your laser focus.
Step 2: Clean the stone surface and set laser focus
Quarry-cut slate blanks often arrive coated with loose shale grit, stone powder, or packing debris. Before placing any blank on the laser bed, wash the stone with water and a soft cloth, or follow the damp-cloth care instructions common to natural slate listings. Allow the stone to dry completely before lasering. Engraving moist slate can trap steam inside stone micro-fissures, causing uneven chipping or surface spalling under the beam.
Because natural slate has a cleft surface with minor elevation changes, setting accurate focus is critical. Use your machine focus gauge to set the focal point on the average plateau of the workpiece rather than a deep dip or raised edge. If you are setting up a machine from our best laser engraver for beginners guide, or choosing equipment through our how to choose a laser engraver resource, ensure the laser gantry moves freely across the stone without catching on rough stone edges.
Step 3: Dial in laser settings for bright contrast
Dialing in dependable slate settings relies on understanding how laser energy interacts with stone. Unlike organic materials that burn or vaporize, slate undergoes localized thermal shock. The beam fractures surface minerals into tiny micro-fissures, turning dark gray stone into an opaque, chalk-white mark. Both diode and CO2 lasers handle this process effectively. If you already operate a machine from our best laser engraver for wood guide, that same diode laser will produce crisp contrast on slate.
Aim for fast travel speeds paired with low to moderate optical power. Excessive laser power or slow travel speeds over-melt the stone, creating pitted craters or dark glassy slag that ruins contrast. Line interval should remain tight enough so raster scan lines overlap cleanly without leaving dark gaps, but loose enough to prevent heat accumulation. A gentle air stream from an accessory reviewed in our best laser air assist guide keeps chalky dust away from the lens without scattering grit.
Image preparation also requires care. Because engraving creates a light mark on dark rock, photographic images must be inverted so highlights burn white and shadows remain untouched dark stone. Vector text and solid logos, by contrast, typically engrave directly: black fills in your design burn into bright white lettering against the dark slate. For workshop safety, although engraving stone produces fine mineral dust rather than organic smoke, proper extraction remains essential. Run an exhaust fan or a unit from our best fume extractor for laser engraver guide. Wear protective glasses verified for your laser wavelength, following our best safety glasses for laser engraving guide. Never laser hazardous plastics such as PVC, vinyl, polycarbonate, or ABS sheets from makers like M METERXITY, as they produce harmful chlorine or cyanide fumes.
Step 4: Engrave, wash and seal the finished slate
Position the slate blank flat on the laser bed. Because natural stone coasters often have minor thickness variations, secure the blank with hold-downs or soft putty so high-speed raster movements do not shift the stone. Once the engraving cycle completes, let the piece cool before handling.
The freshly engraved slate will have a powdery white residue across the engraved lines. Rinse the coaster under clean water or wipe it with a damp microfiber cloth to remove loose mineral particles. Once dry, deciding how to finish the piece depends on your preferred look. If you desire a deeply darkened charcoal background, crafters often apply a thin wipe of food-safe mineral oil to the raw stone before lasering and wipe away excess, allowing the laser to cut clean white marks into the pre-darkened stone. If protecting the piece after engraving, apply a light spray mist of clear matte acrylic or stone sealer. Avoid rubbing liquid oils directly over the finished white engraving, as penetrating oils soak into the micro-fractures and darken the mark.
Common mistakes to avoid
- Applying excessive laser power that causes deep cratering, slag formation, and dark scorching.
- Skipping a calibration grid on scrap stone before running customer blanks.
- Failing to invert photographic portraits, resulting in negative-looking images on dark stone.
- Inverting vector text or logos, which causes the background to burn away instead of the lettering.
- Wiping liquid mineral oil directly over finished white engraving, which darkens the micro-fractures and dulls contrast.
- Engraving wet or damp slate blanks straight out of the wash.
- Relying on unrated safety eyewear or uncertified orange acrylic shields.
- Cutting or engraving hazardous plastics including PVC, vinyl, or ABS sheets.
How to laser engrave slate: the short version
- Select flat natural slate blanks and inspect for surface cracks.
- Clean away dust and grease with water and dry thoroughly.
- Focus the laser beam directly on the top stone surface.
- Dial in slate settings on a spare piece using a parameter grid.
- Engrave the design using raster scanning.
- Wash off mineral residue and apply a light spray sealant or pre-darken blanks to preserve contrast.
Once your parameters are dialed in, repeat the process across your batch, wipe each piece clean, and attach non-slip rubber pads to the underside.
FAQ: lasers and CNC
What laser type works best for engraving slate?
Both diode and CO2 lasers work exceptionally well on natural slate. Diode lasers operating in the blue wavelength create bright white marks with moderate power, while CO2 lasers process larger areas quickly. Fiber lasers can also mark slate, but diode and CO2 machines remain the most practical and accessible options for hobbyists and small workshops.
What are the ideal slate settings for contrast?
Ideal slate settings balance high travel speed with low to moderate laser power. The goal is to fracture the top mineral layer into an opaque white powder without melting the stone into glassy slag. Run a small calibration matrix on spare rock to identify the cleanest contrast for your specific machine wattage.
Do I need to coat or paint slate before lasering?
No coating or paint is required before lasering. Natural slate turns white on its own through localized thermal micro-fracturing. While some crafters apply a thin wipe of mineral oil before lasering to deepen the dark background, bare slate engraves cleanly on its own without chemical sprays or pretreatments.
How should I clean and seal slate after engraving?
Rinse the engraved slate with water or wipe it down with a damp cloth to remove loose mineral dust. Once dry, protect the piece with a light spray of matte acrylic or stone sealant. Avoid rubbing liquid oils over the finished white engraving, as oil fills the micro-fractures and darkens the mark.
Can a diode laser engrave slate coasters?
Yes, diode lasers engrave slate coasters reliably. Because slate requires minimal energy to produce a white mineral fracture, even entry-level diode engravers create sharp, highly detailed marks on dark stone coasters and plaques.
Why is my slate engraving faint or uneven?
Faint or uneven marks usually result from improper focal distance or variations in stone thickness. Natural cleft slate has uneven surface heights, so setting the beam focus on the average elevation is critical. Pitted or dark markings can also occur if laser power is set too high or speed is too slow.
Related: the laser engraver hub, laser engraving projects for beginners and how to start a laser engraving business. Also see our how to price laser engraving work.



