How to Engrave a Tumbler with a Rotary: Step-by-Step Laser Setup Guide
A step-by-step guide on how to engrave a tumbler with a rotary: set up a roller or chuck attachment, level the workpiece, configure software settings, and laser clean graphics.

On this page
Top picks at a glance
As an Amazon Associate I earn from qualifying purchases.
- 1
 xTool S1 40W Laser Cutter and Laser Engraver for Tumblers9.7/10View on Amazon
- 2
 Twotrees TS5 7000mW Laser Engraver for Tumblers Fully9.6/10View on Amazon
- 3
 AlgoLaser 10W Laser Engraver and Cutter with Rotary Roller &9.5/10View on Amazon
- 4
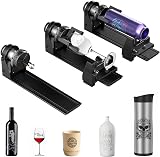 Longer Rotary Roller SeriesView on Amazon
- 5
 Rotary Roller ProView on Amazon
- 6
 xTool RA3 World's First Smart MagSwap Rotary for xTool P3View on Amazon
- 7
 WECREAT Vision Pro 45W Laser Engraver and Cutter with RotaryView on Amazon
- 8
 20 oz Skinny Tumblers Bulk with Lids and Straws BlackView on Amazon
- 9
 YOUKE OLA 16 Pack Stainless Steel Skinny Tumblers BulkView on Amazon
How to engrave a tumbler with a rotary involves mounting the cylindrical cup on a roller or chuck attachment, adjusting machine clearance, leveling the surface so the laser focal plane remains consistent, entering the diameter into control software, framing the graphic, and running the laser beam to ablate the powder coating. The sections below walk through the process step by step, covering hardware setup, software settings, focus, and cleanup.
Other machines to compare
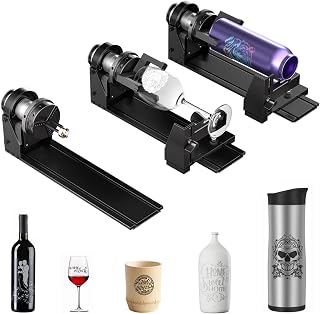 Longer Rotary Roller SeriesCheck price on Amazon
 Rotary Roller ProCheck price on Amazon
 xTool RA3 World's First Smart MagSwap Rotary for xTool P3Check price on Amazon
 WECREAT Vision Pro 45W Laser Engraver and Cutter with RotaryCheck price on Amazon
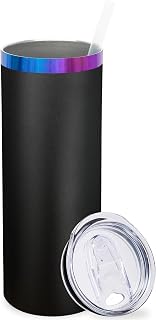 20 oz Skinny Tumblers Bulk with Lids and Straws BlackCheck price on Amazon
 YOUKE OLA 16 Pack Stainless Steel Skinny Tumblers BulkCheck price on Amazon
LaserEngraveHQ earns a commission from purchases made through these links, at no extra cost to you. Read our affiliate disclosure.
Rotary engraving requires rigid leveling and accurate cylinder measurements. We rely strictly on published specifications from equipment makers, with no assumed settings or estimates.
Step 1: Choose between a roller and a chuck rotary
Rotary attachments fall into roller mechanisms and jaw chuck systems. A roller supports the tumbler on parallel cylinders, letting the cup spin freely as the drive wheel turns. This setup accommodates straight drinkware with uniform outer diameters. For example, AlgoLaser lists an adjustable diameter range of 2mm to 150mm across 4 gear positions on its rotary roller. If your tumbler has a tapered profile or an attached handle, rollers can cause the cup to walk sideways or wobble during rotation.
A chuck attachment grips the mouth or base of the tumbler directly with mechanical jaws, locking the cylinder along its central axis. For chuck attachments, Creality publishes outside clamping for cylinders from 1mm to 110mm diameter and inside expansion support from 25mm to 75mm, with stated mechanical accuracy of 0.1mm. Clamping with jaws prevents walking on tapered drinkware and clears handles. For machines with rotary hardware in the box, see our best laser engraver for tumblers roundup.
Step 2: Adjust machine clearance and risers
Rotary units sit higher than flat beds, so your laser module requires extra vertical clearance along the Z-axis. Enclosed desktop machines and open-frame diode units require raising the frame on riser blocks or removing the base plate to drop the rotary underneath. For instance, Longer specifies the use of 12Pcs Riser blocks when mounting its rotary roller beneath compatible frame engraving machines. Without enough elevation, the laser shield will collide with the tumbler.
Some enclosed workstations integrate motorized Z-axis stages into the chassis. WECREAT lists rotary clearance for 40 Oz tumblers alongside an auto-lifting system that adjusts from 1mm to 140mm. Ensure the highest point on your tumbler reaches the required focal plane while clearing the gantry. Small business owners looking to scale drinkware production can compare high-output machines in our best laser engraver for small business guide.
Step 3: Mount and level the tumbler
Precise leveling is critical because a laser maintains focus over a narrow depth. If the tumbler sits tilted, the beam drifts out of focus across the graphic, creating incomplete ablation and blurred lines. Place a small bubble level along the top ridge of the tumbler directly where the laser will fire. On roller attachments, adjust the height bracket or rear support until the bubble is centered. On chuck attachments, pivot the head or adjust the tailstock until the upper line of the cup is level.
Pay close attention to tapered tumblers whose rim diameter exceeds the base diameter. Because the narrow base sits lower on rollers, elevate the base support until the top surface runs parallel to the X-axis gantry. If drinkware slips during fast rotation, place weight inside the tumbler, such as a pouch of clean ball bearings or rice, to increase friction against rubber rollers. Practice alignment on budget blanks from our cheap tumbler blanks comparison.
Step 4: Connect the rotary and verify wiring
A rotary attachment replaces the Y-axis movement of your laser engraver. Power off the machine and unplug the Y-axis stepper cable from the gantry, then insert the connector into the rotary motor port. Swapping cables while the board is powered can damage stepper drivers. Certain rotary packages provide alternative cable harnesses to match different motherboard pinouts. For example, Longer provides two wiring options for its rotary roller to match different motherboard pinouts, noting that one connection fits 80% of engravers and the alternative fits the remaining 20%.
Once connected, power on the machine and observe rotation. If commanding a forward jog rotates the tumbler in reverse, invert the motor direction within your rotary device settings. For machine-specific wiring and stepper calibration on desktop units, read our guide on how to use xTool rotary attachment.
Step 5: Configure software parameters and framing
Open your control software, such as LightBurn or LaserGRBL, and enable rotary mode. Select either roller or chuck. For chuck rotaries, enter the exact cylinder diameter measured with a caliper across the engraving area. For roller rotaries, input the roller wheel diameter and tumbler diameter so the software calculates the correct step pulses per revolution. xTool specifies a precision stepper motor with a minimum angle of 0.45 degrees and vector rotation speeds up to 360 degrees per second on the RA2 Pro.
Position artwork so width represents tumbler circumference and height matches vertical span. Before running the beam, execute a perimeter frame check. Framing moves the laser head along the X-axis while rotating the cup along the Y-axis, confirming the graphic fits without striking rims or handles. For initial program configuration, see our laser engraving software for beginners walkthrough.
Step 6: Run the laser pass and adjust power
Focus the laser beam on the apex of the tumbler curve. Because the surface is rounded, the beam achieves focus only at the uppermost line of the cylinder. Set height using the maker focus block or auto sensor. When engraving powder-coated drinkware, ablate the polymer coating without burning the raw metal underneath. Optical diode power decides the required travel rate. For example, TOOCAA lists a 360 degree rotary kit with travel speeds up to 600mm/s and a 20W optical diode.
Ablating powder coating creates fine particles requiring active ventilation, as covered in our fume extractor guide. Keep a fire extinguisher within immediate reach and never leave an active job unattended. Verify eye protection following our laser safety glasses guide. Never laser PVC, vinyl, PVC-based faux leather, polycarbonate or ABS drinkware wraps, as thermal decomposition releases corrosive gases and hazardous fumes.
Step 7: Clean the engraved surface and inspect
After the laser pass finishes, the design will show dark soot and vaporized paint residue. Leave the tumbler on the rotary until you inspect the lines. If unablated coating spots remain, you can run a second pass without losing alignment. Once ablation is complete, remove the tumbler from the rotary.
Apply denatured alcohol or citrus cleaner to a microfiber cloth and wipe across the engraved area. The solvent dissolves soot, revealing bright stainless steel. Avoid abrasive scouring pads that scratch surrounding powder coating. Rinse with water, dry thoroughly, and inspect graphic lines under good lighting.
Common mistakes to avoid
- Failing to level the tumbler along the laser line, leading to uneven line sharpness.
- Omitting clearance checks, causing the laser shield or air nozzle to collide with the cup.
- Entering incorrect cylinder diameters in software, creating squished or stretched graphics.
- Neglecting active ventilation during powder coat ablation, allowing airborne particles to accumulate.
- Removing the tumbler from the rotary before confirming the coating was fully ablated.
- Attempting to engrave drinkware coated in vinyl, PVC or polycarbonate films.
How to engrave a tumbler with a rotary: the short version
- Choose a roller for straight cups or a chuck for tapered drinkware and handled mugs.
- Elevate the laser gantry or remove the floor plate to provide clearance for the cylinder height.
- Mount the tumbler and level the top surface along the X-axis using a bubble level.
- Power down the machine, connect the rotary cable to the Y-axis port, and confirm rotation direction.
- Measure cylinder diameter with a caliper and enter dimensions into rotary software settings.
- Frame the design boundary, focus the laser beam on the apex, and run the ablation pass.
- Wipe away soot and residue using denatured alcohol on a soft cloth.
Following this structured sequence prevents mechanical collisions, preserves sharp focus across curved surfaces, and produces clean metal graphics on powder-coated drinkware.
FAQ: lasers and CNC
Do I need a roller or a chuck rotary for tumblers?
A roller rotary works well for straight-walled cylindrical cups with uniform outer diameters. For tapered drinkware, irregular contours, or mugs with handles, a jaw chuck is preferable because it grips the cup firmly and prevents axial walking during rotation.
Why are my engraved tumbler graphics stretched or compressed?
Distorted graphics occur when the software step pulse calculation does not match actual surface displacement. Ensure you selected the correct rotary mode in your software, entered the exact measured diameter of your cylinder, and calibrated rotary steps per rotation.
Can a diode laser engrave bare stainless steel tumblers?
Standard blue diode lasers cannot directly engrave bare, uncoated stainless steel without marking spray or thermal bonding compounds. However, diode lasers excel at removing colored powder coating on coated tumblers, revealing the bright bare steel underneath.
How do I level a tapered tumbler on a rotary roller?
Because a tapered cup has a narrower base than rim, the narrower end sits lower on horizontal rollers. Raise the adjustable base support bracket on the rotary until a bubble level placed along the uppermost line of the tumbler shows a horizontal plane parallel to the laser gantry.
What safety gear is mandatory when laser engraving tumblers?
Always run a dedicated exhaust fan or fume filter to vent vaporized powder coating particles. In addition, wear safety glasses certified for the specific wavelength and optical density of your laser module, and keep a fire extinguisher near your workstation.
Can I laser engrave tumblers with vinyl wraps or unknown plastics?
Never engrave drinkware wrapped in vinyl, PVC, or polycarbonate. Laser ablation of chlorinated polymers produces corrosive hydrogen chloride gas that destroys laser optics and creates hazardous workshop air.
Related: explore our main laser engraver hub for machine comparisons. For business pricing strategies, read our guide on how to price laser engraving work.



