How to Use xTool Rotary Attachment: A Step-by-Step Setup Guide
A step-by-step guide to using an xTool rotary attachment: connect the cable, switch between roller and chuck modes, adjust steps per rotation and engrave drinkware.

On this page
Top picks at a glance
As an Amazon Associate I earn from qualifying purchases.
- 1
 UniTak3D Honeycomb Laser Bed 400x400mm Working Table for9.6/10View on Amazon
- 2
 Honeycomb Laser Bed9.6/10View on Amazon
- 3
 Puikos Honeycomb Laser Bed 400 x 400 mm Working Table For9.6/10View on Amazon
- 4
 xTool RA3 World's First Smart MagSwap Rotary for xTool P3View on Amazon
- 5
 xTool RA3 World's First Smart MagSwap Rotary Attachment forView on Amazon
- 6
 xTool S1 40W Laser Cutter and Laser Engraver for TumblersView on Amazon
- 7
 Twotrees TS5 7000mW Laser Engraver for Tumblers FullyView on Amazon
- 8
 Longer Laser Engraver Rotary RollerView on Amazon
- 9
 ACMER M4 Laser Rotary RollerView on Amazon
How to use xtool rotary attachment hardware comes down to distinct setup phases: elevating your laser frame with risers, connecting the rotary motor cable, and selecting roller or chuck mode in your laser software. By replacing flat Y-axis travel with motorized rotation, the unit lets your laser engrave drinkware, tumblers, and glassware at a steady focal distance. The sections below walk through mechanical assembly, software setup, leveling, framing, and final engraving.
Other machines to compare
 xTool RA3 World's First Smart MagSwap Rotary for xTool P3Check price on Amazon
 xTool RA3 World's First Smart MagSwap Rotary Attachment forCheck price on Amazon
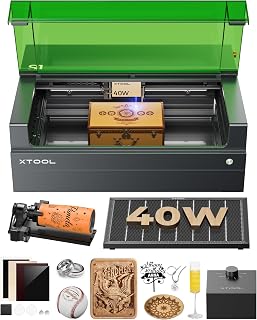 xTool S1 40W Laser Cutter and Laser Engraver for TumblersCheck price on Amazon
 Twotrees TS5 7000mW Laser Engraver for Tumblers FullyCheck price on Amazon
 Longer Laser Engraver Rotary RollerCheck price on Amazon
 ACMER M4 Laser Rotary RollerCheck price on Amazon
LaserEngraveHQ earns a commission from purchases made through these links, at no extra cost to you. Read our affiliate disclosure.
Always power off the laser machine before plugging in or unplugging the rotary motor cable. Connecting or disconnecting a stepper motor while the control board is energized can damage the stepper driver chips.
Step 1: Choose between roller and chuck mode
The first step is matching your hardware to the workpiece shape. The xTool RA2 Pro listing highlights a 4-in-1 modular setup supporting roller rotary, chuck rotary, sphere engraving, and ring stud engraving.
Roller mode uses parallel motorized wheels to turn symmetric cylinders such as straight drink tumblers and bottles. The object rests on the rollers and turns by friction. Roller mode sets up quickly, but irregular weights, handles, or tapers can cause the blank to slip or walk during rotation.
Chuck mode uses expanding or clamping jaws to grip the rim or base of the cylinder. The xTool RA3 listing describes an enlarged 130mm chuck with tool-free attachment swapping. Chuck mode is required for mugs with handles, tapered glasses, and rings because the clamp prevents slippage.
Step 2: Raise the laser frame and connect the rotary cable
A rotary attachment sits higher than a flat honeycomb bed, requiring extra vertical clearance. For open-frame diode lasers, install riser feet beneath the frame corner legs. For enclosed systems like the xTool S1, which the listing notes as a Class 1 machine with 40,000mW output, use the compatible riser base to maintain optical shielding.
Remove the honeycomb plate so the rotary rests flat on the base. Power down the machine completely. Connect the rotary cable to the dedicated rotary port, or unplug the Y-axis motor cable and plug the rotary cable into that connection. The rotary stepper motor now receives the motion pulses normally sent to the Y-axis.
Step 3: Mount and level your cylindrical blank
Clean engraving on curved surfaces requires the top of the cylinder to remain horizontal along the X-axis. If the blank slopes, the focal distance changes as the laser travels, causing uneven lines.
Place your blank into the rotary. In roller mode, adjust the roller spacing so the cylinder rests securely between the wheels. In chuck mode, tighten the jaws evenly around the rim. Place a small bubble level along the top ridge of the cylinder. Adjust the leveling bracket or tailstock until the top surface reads level. For tapered tumblers, elevate the narrow end until the upper engraving surface is parallel to the laser rail.
Step 4: Configure rotary settings in your laser software
Your control software must translate flat coordinates into rotational movement. The xTool RA2 Pro listing notes compatibility with Laserbox Basic, LaserGRBL, and LightBurn. Knowing how to use rotary attachment xtool settings in software requires entering accurate workpiece parameters into the setup panel.
Enable the rotary toggle in your software. Choose roller or chuck mode. For roller mode, enter the roller diameter and steps per rotation from your manual. For chuck mode, enter the steps per rotation and measure the blank diameter with calipers. The xTool RA2 Pro listing specifies a stepper motor with a 0.45° minimum angle and a maximum vector speed of 360°/s. Precise diameter input ensures circles engrave without distortion.
Step 5: Set focus and check rotational clearance
Laser focus on curved objects must be set to the highest point along the cylinder centerline. Position the laser carriage directly above the crest of the blank. Lower the module until its focal gauge or sensor matches the required distance, then tighten the thumbscrews.
Rotate the blank through a complete turn manually or via software controls. Verify that the cylinder turns smoothly without slipping. Confirm that the air assist nozzle, laser shield, and gantry clear the workpiece and clamps. For safety guidance, see our laser accessories hub and fume extractor guide.
Step 6: Frame the graphic and verify alignment
Framing traces the artwork boundary on the workpiece before firing the laser, preventing misaligned engravings. Select your artwork and click framing in your laser software. The carriage moves along the X-axis while the rotary turns the cylinder to outline the engraving area.
Verify that the graphic is centered, avoids seams or handles, and rotates without slipping. If a tumbler slips on rollers, add weight inside the cavity to improve traction. If you are just starting, see our laser engraver for beginners guide and practice on items from our cheap tumbler blanks guide before working on customer orders.
Step 7: Run the engraving pass and inspect results
Equip eye protection matching your laser wavelength and optical density, as covered in our best safety glasses for laser engraving guide. Close your enclosure or lid, start ventilation, and run the job.
The laser fires along the X-axis while the rotary indices the cylinder. The xTool listing highlights a 0.01mm motion accuracy, producing crisp detail on coated drinkware when calibrated properly. Let the job finish and cool before removing the blank. Clean residue with a soft cloth and isopropyl alcohol, then inspect edge sharpness. If you produce drinkware regularly, our best laser engraver for tumblers guide covers dedicated setups.
Common mistakes to avoid
- Plugging or unplugging the rotary cable while the machine is powered on, which risks damaging stepper drivers.
- Engraving a tapered tumbler without leveling the top ridge, causing the beam to lose focus along the design.
- Entering an inaccurate blank diameter in software, resulting in stretched or squashed graphics.
- Skipping the framing pass, which leads to designs overlapping handles or seams.
- Leaving rotary mode enabled in software after finishing, causing flat jobs to scale incorrectly.
How to use xtool rotary attachment: the short version
- Raise the laser frame with risers to clear the attachment height.
- Power off the machine and connect the rotary cable to the dedicated port.
- Choose roller mode for straight cylinders or chuck mode for handled mugs.
- Mount the blank and level the top surface horizontally.
- Enable rotary mode in software and enter the diameter and steps per rotation.
- Focus the laser optic on the highest crest of the workpiece.
- Run a framing pass to confirm alignment, then execute the engraving job.
Following these steps ensures crisp, repeatable markings on tumblers and curved gifts without wasting blanks.
FAQ: lasers and CNC
How to use rotary attachment xtool models with LightBurn?
Open the Rotary Setup window in LightBurn, choose roller or chuck mode, and enable the rotary switch. Enter the steps per rotation from your manual, along with the measured workpiece diameter, so LightBurn scales the artwork accurately.
Do I need risers to use an xTool rotary attachment?
Yes. A rotary sits higher than a flat honeycomb bed, so the laser gantry must be elevated to maintain focal distance. Open-frame diode machines require leg risers, while enclosed units use dedicated riser bases.
Why is my rotary engraving stretched or squashed?
Distorted engravings occur when the software steps per rotation or cylinder diameter do not match the physical workpiece. Verify your diameter measurement with calipers and ensure the correct mode is selected.
Can I engrave tapered tumblers with an xTool rotary?
Yes, but you must level the top surface first. Raise the narrow end using the adjustable support bracket or tilt the chuck until the top line of the tumbler is parallel to the X-axis rail.
Which materials are unsafe for rotary engraving?
Never engrave cylindrical items made from PVC, vinyl, PVC faux leather, polycarbonate, or ABS. Under laser heat, these materials release toxic fumes and corrosive chlorine gas that damage health and machine optics.
How do I switch back to flat engraving after using a rotary?
Power down the machine, disconnect the rotary cable, and reconnect the Y-axis motor cable if it was swapped. Disable the rotary toggle in your software before starting standard flat projects.
Related: our laser accessories hub, best laser engraver for tumblers guide and cheap tumbler blanks comparison. Also see our laser engraver for beginners starter guide and best safety glasses for laser engraving review.