How to Convert an Image to SVG for Laser Cutting: A Practical Step-by-Step Guide
A practical step-by-step guide on how to convert an image to SVG for laser cutting, clean up vector paths, and prepare cut-ready files for your laser software.

On this page
Top picks at a glance
As an Amazon Associate I earn from qualifying purchases.
- 1
 ilauke Wood Squares 4x4 InchView on Amazon
- 2
 Plywood 12PcsView on Amazon
- 3
 3 mm Baltic Birch Plywood 1/8 x 12 x 20 InchView on Amazon
- 4
 Baltic Birch PlywoodView on Amazon
- 5
 30 Pack Basswood Sheets 12"x12"x1/8"View on Amazon
- 6
 10 Pack 16x16x1/8 Inch Basswood SheetsView on Amazon
How to convert an image to SVG for laser cutting requires importing a high-contrast bitmap into vector software, tracing its outline into clean vector geometry, removing overlapping nodes, and exporting closed paths that laser software interprets as cut lines. While raster images record artwork as a grid of individual colored pixels, laser cutters require vector paths to direct the laser beam along smooth curves and cut perimeters. By properly preparing your source artwork, running a brightness threshold trace, and simplifying the resulting outlines, you can turn standard graphic files into production-ready vector cut files. Preparing a clean SVG for laser processing ensures the machine controller follows exact vector paths without stuttering. The sections below walk through each stage of the conversion workflow, from initial raster cleanup to final laser software verification.
Other machines to compare
 ilauke Wood Squares 4x4 InchCheck price on Amazon
 Plywood 12PcsCheck price on Amazon
 3 mm Baltic Birch Plywood 1/8 x 12 x 20 InchCheck price on Amazon
 Baltic Birch PlywoodCheck price on Amazon
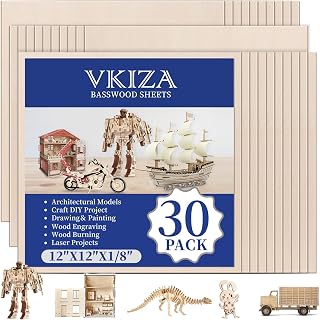 30 Pack Basswood Sheets 12"x12"x1/8"Check price on Amazon
 10 Pack 16x16x1/8 Inch Basswood SheetsCheck price on Amazon
LaserEngraveHQ earns a commission from purchases made through these links, at no extra cost to you. Read our affiliate disclosure.
Automated vector tracing cannot reconstruct details lost in blurry, low-resolution photographs. Starting with clean, high-contrast monochrome artwork saves extensive path editing and eliminates messy, fragmented vector nodes.
Step 1: Select high-contrast artwork with crisp borders
The success of an image-to-vector conversion depends heavily on the quality of your source graphic. Laser cutting software requires unambiguous boundaries to determine where the cut path begins and ends. Silhouette illustrations, solid black logos, high-contrast line art, and simple geometric graphics convert cleanly because the software can easily distinguish dark subject pixels from white background pixels.
Photographs and detailed multi-tone artwork present significant conversion challenges. When an auto-tracing tool processes complex gradients, shadows, or midtone textures, it attempts to generate separate vector boundaries around every subtle shade variation. This produces clusters of jagged, overlapping outlines that confuse laser control software. If you must work from an existing photograph or colored sketch, choose an image with strong lighting and a plain, uncluttered background. For an overview of how machine controllers process different graphic formats, read our guide to laser engraver file types before preparing artwork.
Step 2: Pre-process the bitmap to eliminate background noise
Before launching an automatic trace, edit the raster graphic in a photo editor or your primary vector graphics application. Open the file and convert the graphic to grayscale. Desaturating the artwork removes confusing color hues and allows you to evaluate the contrast strictly through luminosity values.
Adjust the brightness and contrast levels until the dark shapes become solid black and the background becomes pure white. Erase stray dust specks, scanner artifacts, compression noise, and faint watermarks that surround the perimeter of your subject. Any dark mark left on the canvas will be interpreted by vector tracing algorithms as a distinct cut path, resulting in unwanted laser burns on your workpiece. Sharpen soft borders to produce an unmistakable transition between the subject silhouette and the surrounding negative space.
Step 3: Trace the image using vector tracing tools
Import your pre-processed raster file into vector design software such as Inkscape, Adobe Illustrator, or directly into dedicated laser applications. Select the bitmap image and open the vector tracing utility, commonly labeled Trace Bitmap or Image Trace. Choose a brightness cutoff or threshold tracing mode, which segments the image into black and white regions based on a selectable luminance threshold.
Adjust the threshold slider while viewing the live preview until the generated vector contours capture all necessary silhouette details without incorporating perimeter noise. If you operate LightBurn for direct machine control, you can execute this conversion natively without launching external illustration programs; see our in-depth walkthrough on tracing images in LightBurn for detailed software controls. Once the preview outlines the design accurately, confirm the operation to generate the new vector layer directly over the original raster graphic.
Step 4: Clean up nodes and join open vectors
After completing the trace, delete or hide the original bitmap layer to inspect the raw vector paths. Switch to the node editing tool to reveal the anchor points that define the curves. Auto-tracing utilities frequently deposit clusters of redundant nodes along straight lines and shallow arcs. An excessive density of anchor points causes the laser head to decelerate, stutter, and vibrate, producing jerky motion and scorch marks along the edges of your material.
Apply a path simplification command to remove extraneous nodes while preserving the original silhouette profile. Zoom in closely to inspect the perimeter for unintended double lines, stray voids, or unjoined path endpoints. When cutting parts that must drop out cleanly from the host sheet, exterior cut contours must form closed vector loops; an open gap leaves the part attached to the surrounding material. Keep intentional open lines only where you plan to score surface marks or relief slits, and join separate outline segments into unified closed paths before proceeding.
Step 5: Separate cutting contours from engraving fills
A complete laser project often incorporates both surface engraving and perimeter cutting within a unified design. Laser control programs differentiate between these operations by reading the assigned stroke color or designated design layer. Establish distinct color-coded layers in your vector editing workspace to separate internal surface graphics from through-cut borders.
Assign distinct color-coded layers or stroke colors with no fill to paths intended for through-cutting. For decorative shapes and text intended for surface engraving or pocket fills, assign a contrasting color layer or solid fill. Laser control programs use these separate color layers to apply different power and speed settings for cutting versus engraving. If you are comparing design suites to handle multi-layer graphic layouts, review our guide to starter laser software options to discover which design environments best match your workflow needs.
Step 6: Scale artwork to match your machine workspace
Vector graphics can be scaled indefinitely without degrading line crispness or losing dimensional fidelity. However, the physical cut piece must correspond to real-world measurements and stay within the movement envelope of your machine gantry. Lock the aspect ratio in your software transform panel and enter the exact dimensions required for your finished craft piece or product blank.
Confirm that the total graphic boundary fits inside your specific laser machine bed. Working dimensions vary significantly across models; for example, the ATOMSTACK Swift Mini listing publishes a 135x145mm workspace, whereas larger machines offer much wider beds. Always scale your vectors to match the physical boundaries of your equipment and the blank material on your work table. In addition to sizing, workshop safety requires strict preparation before running physical cuts. Keep a suitable fire extinguisher within arm’s reach of your machine and never leave an active job unattended. Always maintain an active exhaust ventilation system or an approved filter unit to remove process smoke according to OSHA workshop safety principles; our fume extractor guide explains extraction requirements for workshop air quality. Never process hazardous plastics such as PVC, vinyl, PVC-based faux leather, polycarbonate, or ABS, because thermal decomposition releases corrosive gases that damage machine rails and internal optics; consult our list of materials you should never laser cut. For eye safety, always wear protective eyewear with certified optical density matched to your laser beam wavelength, as unrated orange acrylic shields do not provide proper optical protection; consult our laser safety glasses selection guide.
Step 7: Export clean SVG files and verify in laser software
With nodes simplified, colors layered, and dimensions configured, export your design using the Scalable Vector Graphics format. When opening the export dialogue, select plain SVG or standard SVG rather than proprietary editor formats that embed unnecessary editor metadata. Ensure that text elements have been converted entirely to vector paths, as laser controllers cannot interpret raw typography without matching system font files installed.
Import the newly generated SVG into your laser control suite to verify machine interpretation. Inspect the software visualizer to ensure all cutting lines register as vector cuts rather than raster scans, and review the motion simulation to confirm logical cut ordering from inner details outward to outer perimeters. If you are deciding on a dedicated program for operating your laser and tracing vectors, read our analysis on whether LightBurn is worth the investment. Running a sample cut on a scrap piece of wood confirms that your vector kerf and geometry align properly before processing expensive materials.
Common mistakes to avoid
- Tracing low-resolution, blurry photographs without establishing clean contrast first.
- Leaving stray background speckles that generate unintended laser cut marks on the material.
- Ignoring redundant node clusters that induce machine gantry shuddering and edge burning.
- Exporting unjoined vector contours when a design requires fully detached parts.
- Failing to convert font typography into outline paths prior to exporting the vector file.
- Attempting to cut hazardous sheet plastics like vinyl or PVC that release corrosive hydrogen chloride.
How to convert an image to SVG for laser cutting: the short version
- Select high-contrast black-and-white artwork with defined borders.
- Clean up digital artifacts, stray specks, and background pixels.
- Trace the raster bitmap into vector outlines using path tracing tools.
- Simplify nodes and delete overlapping or duplicate line segments.
- Assign distinct vector colors for cutting lines versus engraving fills.
- Scale dimensions to your machine bed and verify geometry in laser software.
Once you understand the progression from raster pixels to vector paths, converting graphics becomes a predictable routine for any laser project.
FAQ: lasers and CNC
What is the difference between raster images and SVG files for laser cutting?
Raster images consist of fixed pixel grids that define color values across a rectangular canvas, making them suitable for surface engraving but unsuitable for directing cut paths. An SVG stores mathematical coordinate vectors that guide the laser focus head along precise physical trajectories, allowing clean, continuous material cutting at any scale.
Can I laser cut directly from a PNG or JPEG without converting to SVG?
Laser machines require vector path coordinates to steer the cutting beam along continuous outlines. A raster PNG or JPEG contains only pixel grids, which laser software can burn into surfaces line by line but cannot follow as a continuous cut trajectory. While some laser programs include built-in trace tools to generate vectors from an imported bitmap, the cutting operation always relies on vector geometry.
Why does my laser cut double lines on traced SVG shapes?
Double cut lines occur when auto-tracing software traces both the inner and outer boundaries of a thick raster stroke rather than generating a single centerline path. You can correct this by deleting the redundant interior vector loop or by applying a centerline trace instead of an outline trace.
Which free software can convert images to SVG for laser cutting?
Inkscape is an open-source vector illustration package that includes powerful bitmap tracing and node simplification tools suitable for preparing laser cut graphics. Many laser control applications also feature integrated tracing capabilities that eliminate the need for third-party graphic suites.
How do I stop traced vectors from having too many nodes?
Reduce node counts by applying path simplification commands within your vector editor, raising the curve smoothing tolerance during initial tracing, and manually deleting redundant anchor points along straight line spans. Cleaner paths yield smoother gantry movement and cleaner edge finishes.
Do I need an SVG file if I only want to engrave instead of cut?
For surface fill engraving, laser software can work directly with raster images such as PNG or JPEG files using raster scanning modes. However, converting artwork to SVG is beneficial if you want to scale the design without pixelation, combine surface engraving with perimeter cuts in one job, or use vector line marking (scoring) along paths, which is faster than scanning solid fills line by line.
Related: the laser software hub, our overview of laser engraver file types, and our guide on tracing images in LightBurn. Also see our guides on sourcing laser cut files and SVG designs, the best laser engraver for beginners, the best laser engraver for wood, and the best laser engraver for small business.