What Is Lines Per Inch in Laser Engraving: A Practical Guide
A practical guide explaining lines per inch in laser engraving, covering line spacing, beam spot size, engraving speed, and how to dial in clean detail.

On this page
Top picks at a glance
As an Amazon Associate I earn from qualifying purchases.
- 1
 OMTech 100W CO2 Laser Engraver with 4 Way Pass Through Air9.7/10View on Amazon
- 2
 Geetery 30 Pack 3mm Cast Acrylic Sheets for Laser Cutting9.5/10View on Amazon
- 3
 12 Piece 1/8 Thick 12 x 12 Inch 3mm Color Casting Acrylic9.4/10View on Amazon
- 4
 2 Pieces Laser Engraving Marking Paper 15.3x10.6 Inch LaserView on Amazon
- 5
 Laser 1 Laser EngraverView on Amazon
- 6
 ilauke Wood Squares 4x4 InchView on Amazon
- 7
 MONKEY SUN 24 Pack 4 x 4 Inch Gorgeous Black Slate StoneView on Amazon
- 8
 MONKEY SUN 60 Pack 4 x 4 Inch Gorgeous Black Slate StoneView on Amazon
- 9
 MONKEY SUN 12Pack 4 x 4 Inch Gorgeous Black Slate StoneView on Amazon
What is lines per inch in laser engraving? In laser engraving, lines per inch, commonly abbreviated as LPI, defines the density of raster scan lines that a laser head engraves across an inch of material along the indexing axis. A higher line density places scan passes closer together to produce solid fills and dark tones, while a lower line density spaces passes farther apart to reduce job duration. The sections below explain how line density functions, how beam spot geometry dictates resolution, how line spacing converts to millimeter intervals, and how to dial in clean results on workshop projects.
Other machines to compare
 2 Pieces Laser Engraving Marking Paper 15.3x10.6 Inch LaserCheck price on Amazon
 Laser 1 Laser EngraverCheck price on Amazon
 ilauke Wood Squares 4x4 InchCheck price on Amazon
 MONKEY SUN 24 Pack 4 x 4 Inch Gorgeous Black Slate StoneCheck price on Amazon
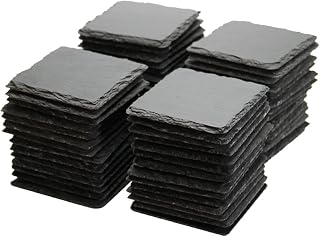 MONKEY SUN 60 Pack 4 x 4 Inch Gorgeous Black Slate StoneCheck price on Amazon
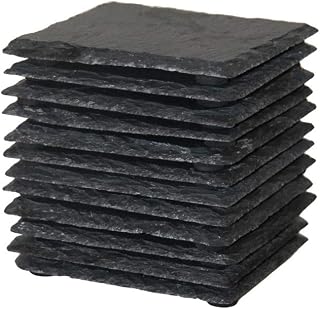 MONKEY SUN 12Pack 4 x 4 Inch Gorgeous Black Slate StoneCheck price on Amazon
LaserEngraveHQ earns a commission from purchases made through these links, at no extra cost to you. Read our affiliate disclosure.
Setting an excessively high line density does not produce a sharper engraving. When line spacing is compressed far beyond the physical focal spot of the laser beam, repeated overlapping passes reheat the same groove, which can cause charred borders and loss of fine detail rather than improved clarity.
Step 1: Understand how raster line density works
Raster engraving works by moving the laser carriage back and forth across the workpiece while pulsing the laser beam on and off according to the source image. After completing each pass, the machine advances along the indexing axis by a small increment and begins the next line. Lines per inch describes how many of these parallel scan tracks fit into an inch of indexing travel.
When line density is set too low, distinct unburned gaps appear between adjacent tracks, creating visible horizontal banding across shaded areas. When line density allows adjacent tracks to touch with slight overlap, the laser produces an even, solid fill. Controlled overlap can deepen mark darkness on materials like wood or leather. However, excessive overlap causes heat buildup, scorching, and blurred edges. For an overview of how raster engraving differs from vector cutting paths, see our guide to laser engraver file types.
Step 2: Match line density to laser spot size
The physical focal spot of your laser beam establishes the true optical resolution limit of your machine. Diode laser modules focus light through optical lenses into a small rectangular or elliptical spot. If you program a line spacing narrower than this focal spot, adjacent beam passes will overlap. If the line spacing is wider than the spot, blank strips remain between passes.
Different machines feature different focal spot dimensions. For example, Longer lists a compressed laser spot of 0.08×0.1mm on its RAY5 20W module and an ultra-fine spot of 0.04mm x 0.04mm on its compact Ray5 mini. Longer also specifies a 0.06×0.06mm spot on the Ray5 miniS and a 0.08×0.08mm spot on the RAY5 5000mW machine. Meanwhile, Aufero lists a 0.12×0.15mm spot on its Laser 1 module, and Ortur specifies a 0.05mm x 0.1mm compressed point on the Laser Master 2 Pro S2.
A machine with a 0.04mm spot can achieve much finer line density before lines begin to overlap than a machine with a 0.12×0.15mm spot. For makers evaluating desktop hardware, our overview of diode laser engravers explains module designs and focal configurations. If you are selecting your first entry-level workshop machine, our guide to budget laser engravers compares practical starter options.
Step 3: Convert line density to line interval spacing
Most laser control programs, including LightBurn and LaserGRBL, use line interval measured in millimeters rather than lines per inch. Line interval is the physical distance the machine moves along the indexing axis between consecutive scan passes. The relationship between the two settings is inverse: increasing lines per inch decreases the millimeter line interval, placing scan passes closer together.
Software also allows operators to select the scan angle, choosing between horizontal, vertical, or angled raster directions to align line tracks with material grain. Switching between lines per inch and line interval allows you to match software parameters directly to your laser focal spot geometry. If you are configuring your control software for the first time, read our guide on laser engraving software for beginners.
Step 4: Select line density based on material type
Different engraving blanks respond differently to laser heat, requiring you to adjust line density according to material characteristics:
- Wood: Softwoods with alternating growth rings absorb heat unevenly. Setting line density too high causes heat to bleed across soft wood fibers, blurring fine details. Dense hardwoods maintain sharper edges under closer line spacing. For lumber guidance, read our guide to the best wood to laser engrave.
- Coated metal: Anodized aluminum and powder-coated drinkware need only enough line density to ablate the colored coating. Setting line density beyond the laser spot width wastes cycle time and adds excess heat without improving contrast.
- Acrylic: Cast acrylic engraves with a crisp frosted finish when raster passes slightly overlap. Excessive line density generates high surface heat that melts acrylic edges, creating rough, uneven ridges.
- Leather: Natural vegetable-tanned leather engraves cleanly with moderate line density. High density chars the surface grain, leaving brittle, scorched marks.
Never engrave PVC or vinyl, as thermal decomposition releases toxic chlorine gas and hydrogen chloride that corrodes laser optics and workshop machinery. Materials like polycarbonate and ABS also present safety hazards, producing dense hazardous smoke and melting excessively.
Step 5: Balance engraving resolution with job run time
Line density directly governs job run time. When you double your lines per inch setting, the laser head must execute twice as many scan passes across the graphic area. Because the machine must accelerate, scan, decelerate, and index on every single pass, higher line density increases total engraving duration significantly.
Rated carriage processing speeds vary across machines. Longer lists processing speeds up to 10000mm/min and 24000mm/min on its RAY5 20W, while Ortur lists processing speeds up to 15000mm/min on the Laser Master 2 Pro S2. Aufero specifies a processing speed of 3000mm/min on the Laser 1. While higher travel speeds help offset long run times, high-speed direction reversals can cause mechanical ringing or banding if frame belts are loose.
For large signs, cutting boards, or wide fills, keep line density moderate to complete jobs efficiently. Reserve dense line spacing for small emblems, miniature text, or photo engravings where fine detail is visible to the naked eye.
Step 6: Adjust power and speed for tighter line spacing
As line density increases and passes sit closer together, thermal energy accumulates in the material. If laser power and carriage speed remain fixed while line density increases, the workpiece receives far more cumulative energy per unit area, resulting in charred borders and deep, uncontrolled burn troughs.
Higher-power laser modules require careful thermal management during raster work. For example, Longer equips its RAY5 20W with a 20W optical output module, while Ortur equips the Laser Master 2 Pro S2 with a 10000mW module. With higher optical power, dense line spacing concentrates heat rapidly, making it necessary to reduce laser power percentage rather than letting excess heat burn beyond graphic perimeters.
Consult our laser engraver speed and power settings chart for starting power and speed baseline recommendations across different materials.
Step 7: Inspect line overlap on sample runs
Rather than guessing line density on an expensive production blank, run calibration swatches on scrap material of the exact same type. Create small square patches with incremental line interval settings to evaluate beam interaction directly.
Examine the sample patches under strong task lighting:
- Check for gaps: If raw material lines show between passes, line density is too low for your beam spot size.
- Check for burning: If edges char, fine lettering fills in, or the surface scorches, line density is too high or laser power is excessive.
- Check for smooth fill: When line spacing matches spot width, scan lines blend into a uniform mark with crisp perimeter borders.
Proper focal distance is critical during sample runs. A defocused beam enlarges the spot size, making planned line spacing inaccurate. Learn how to set correct focal height in our guide on how to focus a diode laser engraver.
Common mistakes to avoid
- Setting line density far beyond the optical spot size of the laser module.
- Running dense line spacing on heat-sensitive materials without reducing laser power.
- Using high line density on coarse materials where fine detail burns away.
- Ignoring the massive increase in job duration caused by tightly packed lines.
- Skipping sample runs on scrap material before starting production jobs.
What is lines per inch in laser engraving: the short version
- Lines per inch defines the number of raster passes across an inch of material.
- Line interval spacing is the gap between consecutive raster lines.
- Match line spacing to the actual focal spot size of your laser module.
- Adjust line density to suit the texture and thermal traits of your material.
- Keep line density lower on large graphics to avoid excessive job run time.
- Verify line overlap with sample runs on scrap material before engraving.
Engraving quality depends on matching line density to your laser beam spot, balancing clean fill against heat buildup and job duration.
FAQ: lasers and CNC
Does higher lines per inch always mean better engraving quality?
No. Engraving quality only improves with higher line density up to the physical resolution limit of the laser focal spot. Once line spacing becomes significantly tighter than the focal spot, consecutive passes repeatedly burn over the exact same area. This produces over-burning, charred edges, and loss of fine definition rather than increased sharpness.
How does lines per inch differ from dots per inch?
Lines per inch defines the number of raster scan tracks packed across an inch measured perpendicular to the travel direction. Dots per inch refers to individual laser pulses or image pixels placed along each linear inch of carriage travel. In laser engraving software, line density determines line-to-line spacing, while dot density determines pulse density along each pass.
Can excessive line density damage delicate materials?
Yes. Tightly packed raster lines concentrate substantial thermal energy in a compact area. On materials like thin plywood, acrylic, or leather, heavy beam overlap can scorch surfaces, cause warping, or melt fine features. When using dense line spacing, lower the laser power or increase travel speed to prevent excessive heat buildup.
How does lines per inch affect engraving job run time?
Line density has a direct, proportional impact on job duration. If you double the line density, the laser carriage must perform twice as many physical passes across the workpiece. Because the laser head must accelerate, scan, decelerate, and index down for every pass, higher line density significantly extends total production time.
What laser spot size is needed for high-resolution engraving?
A smaller focal spot allows for tighter line spacing without beam overlap. Longer lists a 0.04mm x 0.04mm spot on its Ray5 mini and a 0.06×0.06mm spot on the Ray5 miniS, while Ortur lists a 0.05mm x 0.1mm spot on the Laser Master 2 Pro S2. Modules with larger spots, such as the 0.12×0.15mm spot on the Aufero Laser 1, require wider line spacing to prevent heavy overlapping burns.
Why do horizontal lines or gaps appear across my engraving?
Visible horizontal gaps, often called banding, occur when the line spacing between passes is wider than the width of the laser beam spot. This leaves narrow strips of unburned material between passes. Reducing line interval spacing or increasing lines per inch closes these gaps. For further troubleshooting, see our guide on why are my laser engravings blurry.
Related: our laser engraver hub, laser engraving projects for beginners and how to choose a laser engraver. Also see our best laser engraver for wood.



