Clamping Ideas on a CNC Router: Practical Workholding Methods for Clean Cuts
A practical guide to clamping ideas on a cnc router: choose T-tracks, painter tape and glue, side clamps, vacuum pods, and spoilboard screws for secure setups.

On this page
Top picks at a glance
As an Amazon Associate I earn from qualifying purchases.
- 1
 SpeTool Carbide Single Flute CNC Router Bits 1/8" Cutting9.7/10View on Amazon
- 2
 SainSmart Genmitsu 3020-PRO Ultra CNC Router Machine9.7/10View on Amazon
- 3
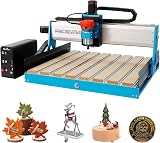 6050 CNC Router Machine9.6/10View on Amazon
Clamping ideas on a cnc router come down to matching workholding to part geometry, stock thickness, and toolpath clearance. Rigid blanks can be secured with T-track hold-down clamps, while cutouts and thin sheets benefit from painter tape and glue, edge clamps, or vacuum hold-down. The sections below explain each clamping method step by step, showing how to secure workpieces, prevent stock movement, and clear cutting tools.
LaserEngraveHQ earns a commission from purchases made through these links, at no extra cost to you. Read our affiliate disclosure.
Workpiece security is essential for clean milling results and workshop safety. A loose blank can ruin stock, break carbide cutters, or lift during spindle passes. Match your clamping strategy to the cutting forces and clearances required for each job.
Step 1: Choose T-track tables and hold-down clamps for rigid stock
T-track systems remain a versatile workholding solution for CNC routing. Aluminum extrusions with standardized slots allow hold-down clamps, step blocks, and studs to slide into position anywhere along the bed. On machines like the Genmitsu PROVerXL 6050 Plus, durable aluminum T-track grid extrusions support MDF spoil boards across a 600 x 500 x 115mm working area, creating a hybrid table that combines rigid tracks with easy spoilboard maintenance. For compact setups like the LUNYEE 3018 Pro Ultra, which provides a 300 × 180 × 80mm working area, the maker includes two T-track clamps to anchor stock directly to the aluminum table.
Hold-down clamps apply downward leverage directly onto the top face of the workpiece. Position the pivot bolt closer to the workpiece than to the rear support block so tightening force presses downward onto the stock rather than lifting the back of the clamp. Place a scrap block beneath the rear clamp foot level with or slightly taller than the workpiece surface. When selecting hardware, check our guide on the best CNC hold down clamps to match bolt sizes and reach to your machine bed. For shop-built tables, installing aluminum T-track for woodworking provides flexible hold-down points across any spoilboard.
Step 2: Use painter tape and glue for thin blanks and full perimeter cuts
When an operation requires cutting around the outside perimeter of a part, top-mounted clamps obstruct the path of the end mill. The painter tape and cyanoacrylate adhesive technique solves this problem by securing the underside of the material to the spoilboard. Apply strips of blue painter tape or masking tape across your spoilboard, burnishing the tape flat to eliminate air bubbles. Apply a matching layer of tape to the clean back face of your workpiece blank.
Apply a bead of cyanoacrylate glue over the spoilboard tape, then spray activator onto the workpiece tape. Press the workpiece firmly onto the spoilboard. The adhesive forms a rigid bond between the tape backings, anchoring the stock against lateral cutting forces. Because the adhesive never touches raw material or the spoilboard directly, removing the finished part requires gentle prying with a putty knife, leaving no sticky residue behind. This method is especially useful for machining delicate craft parts, thin acrylic panels, and decorative signs where clamp footprints would mar the stock.
Step 3: Use side clamps and cam fixtures to keep top faces clear
Surfacing slabs, pocketing trays, and carving detailed reliefs require full access across the top surface of the workpiece. Low-profile edge clamps, cam clamps, and wedge fixtures hold material by applying horizontal force against the outer edges of the blank rather than pressing down from above. Keeping clamping hardware below the stock surface level allows your router bit to travel freely across the face without collision risk.
To build a reliable side-clamping setup, anchor a straight reference fence along an edge of your spoilboard to establish a solid backing. Place your workpiece against the fence, then position cam clamps or wedge clamps against the opposite edges. Rotating the eccentric head of a cam clamp presses stock firmly against the reference stop. For repetitive production runs, dedicated cam clamps for CNC deliver rapid locking with a turn of a hex key. If you need faster clamping action for production parts, toggle clamps for CNC provide quick-action downward or push-pull clamping force with a single lever stroke. Ensure the workpiece remains flat against the spoilboard and avoid excessive force that could buckle thin stock upward.
Step 4: Fasten sheet goods directly into an MDF spoilboard
Direct screw fastening into a sacrificial spoilboard is among the strongest and most economical workholding methods for plywood sheets, hardwood panels, and composite materials. A prepared MDF spoilboard provides excellent screw-holding strength, allowing coarse-thread drywall screws or woodworking screws to pull warped stock flat against the bed. Review our guide on how to set up a spoilboard on a CNC to mount and prepare your baseboard.
To secure material with screws safely, design oversized perimeter margins into your CAD layout. Drive screws through these perimeter waste zones before starting the cut. If your design features large interior drop cutouts, such as window openings or bowl cavities, place additional screws in those waste areas to prevent cutouts from vibrating against the spinning end mill. Always verify toolpath clearances in your CAM preview to confirm that the cutter never crosses a screw location. Pairing your setup with a surfacing bit from our best surfacing bit for CNC guide keeps your spoilboard level and ensures uniform cut depths.
Step 5: Use vacuum hold-down and pods for production panel work
Vacuum hold-down systems use atmospheric air pressure to clamp flat sheet materials securely across their surface area. In a vacuum table setup, a vacuum pump draws air through a porous bleeder board, creating negative pressure beneath the workpiece. Surrounding atmospheric pressure presses stock down with uniform force across the entire face. Because there are no physical clamps on the top face or edges, you can machine cabinet components, nest multiple parts, and profile contours in an uninterrupted operation.
For workshops where a large vacuum pump is impractical, localized vacuum pods offer a versatile alternative. Vacuum pods are compact, sealed chambers placed on the table and connected to a workshop vacuum or venturi generator. Rubber gaskets seal the pod perimeter against the machine table and the workpiece underside. Vacuum pods elevate the workpiece above the table, providing clearance for through-cutting without cutting into your spoilboard. While vacuum clamping excels on non-porous sheets like smooth plywood, solid surface composites, and plastics, porous hardwoods and warped boards may require supplemental mechanical stops to prevent sliding under lateral tool loads.
Step 6: Align repeat work with corner fences and indexing pins
Repeatable workholding requires accurate registration so multiple blanks can be swapped into the machine without re-zeroing work coordinates. Surfacing a wooden or MDF reference fence directly on your CNC table creates a square corner aligned with your machine X and Y axes. Pushing a blank into the inside corner of the fence guarantees that your stock origin matches your programmed software zero point. For batch work, combine corner stops with clamps from our CNC clamps for woodworking guide to lock workpieces down quickly.
Indexing pins take registration a step further, especially for double-sided milling where parts must be flipped over and aligned accurately. By machining an array of dowel holes through the spoilboard and into workpiece waste areas, you can insert dowel pins to register the flipped workpiece with exact symmetry. Registration pins and open machine frames also enable indexing oversized panels that exceed machine travel limits. For example, large-format machines like the Genmitsu PROVerXL 4×4, with its 1300mm x 1300mm work area, feature an open front and back design engineered specifically to index standard 4′ x 8′ sheets in successive machining passes. Machining indexing alignment marks or locating pin holes allows you to slide sheets through the machine, re-clamp, and continue long carves seamlessly.
Common mistakes to avoid
- Placing metal hold-down clamps inside the programmed cutter path or rapid traverse clearance zone.
- Over-tightening mechanical edge clamps, which can buckle thin stock upward and produce uneven cut depths.
- Relying exclusively on adhesive tape for heavy milling passes in dense hardwoods without supplemental stops.
- Failing to resurface an uneven or grooved spoilboard before securing flat sheet materials.
- Using dull end mills that dramatically increase cutting forces and push workpieces out of clamp alignment.
Clamping ideas on a cnc router: the short version
- Select T-track hold-down clamps for rigid stock when toolpaths leave adequate perimeter margins.
- Apply painter tape and cyanoacrylate glue for thin stock, delicate cutouts, and full perimeter profiling.
- Use low-profile side clamps or cam fixtures against a reference fence to keep top faces clear.
- Drive screws through perimeter waste margins or interior drop zones directly into MDF spoilboards.
- Deploy vacuum tables or localized vacuum pods for rapid panel processing on non-porous flat stock.
- Set square reference fences or dowel pin grids to repeat setups quickly across production runs.
Selecting the right workholding method depends on part geometry, stock thickness, and toolpath clearance. Combining mechanical reference fences with sacrificial hold-down techniques delivers rigid, chatter-free clamping for clean workshop results.
FAQ: lasers and CNC
What is the most secure clamping method for CNC routing?
Mechanical T-track hold-down clamps and direct screw fastening into an MDF spoilboard provide the strongest holding force for rigid hardwoods, composites, and metals. When toolpath forces are high during aggressive roughing passes, mechanical fasteners anchored to table extrusions or threaded inserts prevent stock movement far more reliably than adhesive methods alone.
Can painter tape and super glue hold metal on a CNC router?
Painter tape paired with cyanoacrylate adhesive can hold aluminum and brass sheets for shallow engraving passes and light isolation routing, but heavy milling passes can shear the tape backing. For aggressive metal cutting passes, combine tape hold-down with mechanical corner fences or switch entirely to aluminum hold-down clamps.
How do I prevent router bits from hitting metal clamps?
Always verify toolpath previews in CAM software, define clamp keep-out boundaries, and ensure your safe Z retract height clears the tallest clamp bolt on the table. Many woodworkers use wooden or composite hold-down clamps, which yield safely to carbide end mills during accidental collisions without breaking the cutter or damaging the spindle.
What is the best way to hold down thin sheet stock?
Thin sheet materials like acrylic, plywood veneers, and plastic sheets tend to bow upward when clamped only from the edges. The painter tape and cyanoacrylate glue technique or a vacuum spoilboard applies uniform holding force across the entire underside of the material, keeping thin stock flat without perimeter distortion.
When should I use an MDF spoilboard instead of an aluminum table?
MDF spoilboards allow through-cutting, contour profiling, and direct screw fastening without risking damage to the underlying aluminum machine bed. Individual spoilboard sections can be surfaced flat with a spoilboard cutter and replaced at low cost when worn, making MDF the standard work surface for woodworking routers.
Related: the CNC router hub, best CNC hold down clamps, toggle clamps for CNC, and cam clamps for CNC. Also see our guides on CNC clamps for woodworking, aluminum T-track for woodworking, and how to set up a spoilboard on a CNC.